
'%20x='0'%20y='0'%20height='100%25'%20width='100%25'%20%0A%20%20%20%20%20%20%20%20%20%20xlink%3Ahref='data:image/jpg;base64,/9j/4AAQSkZJRgABAQAAAQABAAD/2wCEAAMDAwMDAwQEBAQFBQUFBQcHBgYHBwsICQgJCAsRCwwLCwwLEQ8SDw4PEg8bFRMTFRsfGhkaHyYiIiYwLTA+PlQBAwMDAwMDBAQEBAUFBQUFBwcGBgcHCwgJCAkICxELDAsLDAsRDxIPDg8SDxsVExMVGx8aGRofJiIiJjAtMD4+VP/AABEIAAUACgMBIgACEQEDEQH/xABbAAEBAQAAAAAAAAAAAAAAAAAAAwgQAAICAgMBAAAAAAAAAAAAAAERAAISEwMEITEBAQEAAAAAAAAAAAAAAAAAAAMGEQEAAwEBAAAAAAAAAAAAAAABAAIDBBH/2gAMAwEAAhEDEQA/AM58PW3YgXxFiR8aTktFK+FleNxElQFj4c+OmQ2r6k//2Q=='%3E%3C/image%3E%3C/svg%3E)
In a 3D game involving cube-shaped blocks like Minecraft, creating circles can be a difficult task to say the least. By default, the very nature of the game makes creating circular creations quite tricky in comparison to other voxel-style games that don't mind using elliptical in-game models.
Nevertheless, if players are determined and get some practice, they can create circular structures in Minecraft as well. Doing so won't be easy, but once players have the basic process down, they should be able to brush up on their skills and create plenty of builds that feature round creations in their composition.

Before players start making massive elliptical builds, they'll want to start off small and apply the same process to a larger build somewhere down the line.
Building a basic 15x15 Circle in Minecraft
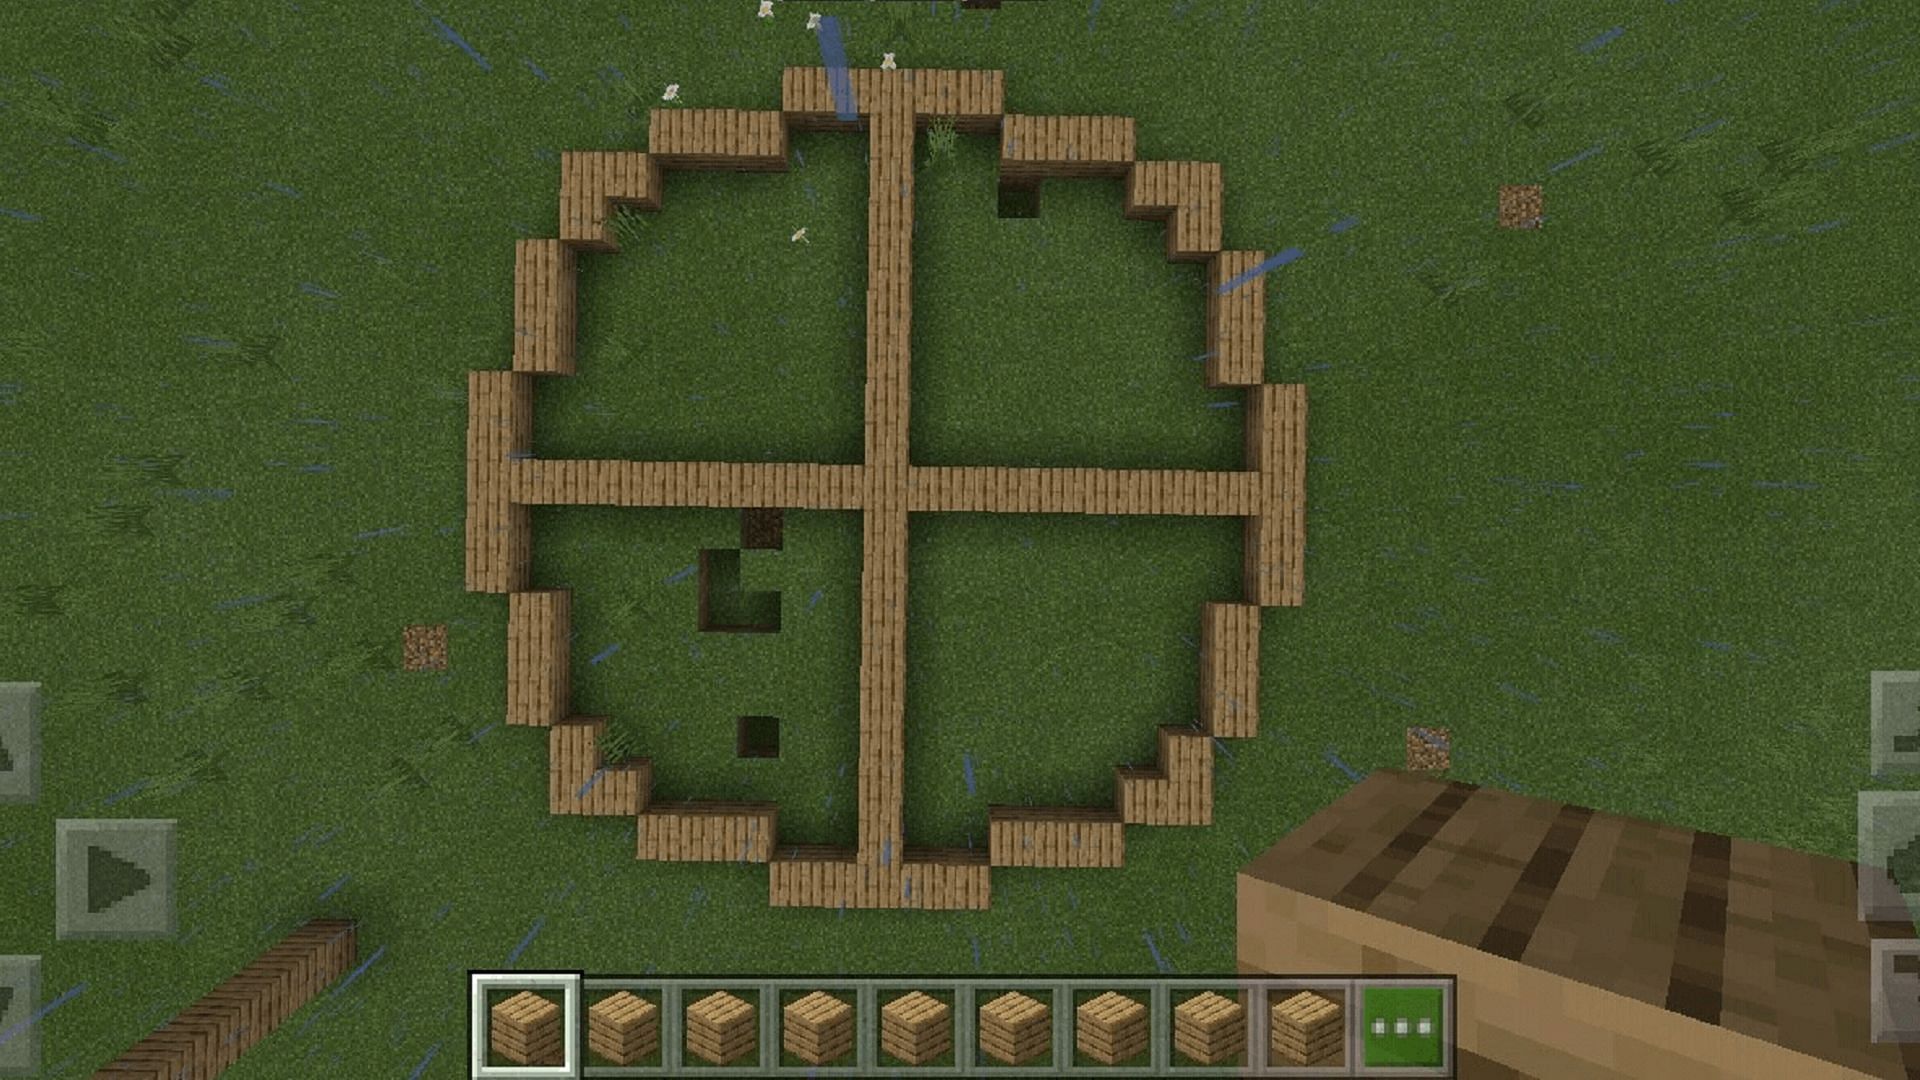
Creating a circle can be a tricky proposition when a player first starts doing it, but by setting a foundation and working around it, the process is much less daunting than it appears. By beginning with the interior and building the outer rim afterwards, Minecraft players can create a perfectly good circle before filling it in with whatever blocks they'd like to use.
Creating a 15x15 Circle easily in Minecraft
- Pick a spot where you'll create the center of the circle and place a block. Then, build a plus shape using the placed block as the middle. Build out each leg of the plus sign to a length of 15 blocks.
- At the end of each leg of the plus sign, place two blocks to the left and two blocks to the right of the last block of the leg.
- You should now have small extended rows on each end of the plus sign. At the end of each of these rows, place a block below the ends of the rows on either side and then build to the left and right by two blocks respectively.
- Below the lines built in Step 3, place one more block underneath on each side.
- Repeat these steps until you've connected two legs of the plus sign and then do the same until each part of the plus sign is connected. With a fillable frame, you can now fill in the empty space with any blocks you see fit.
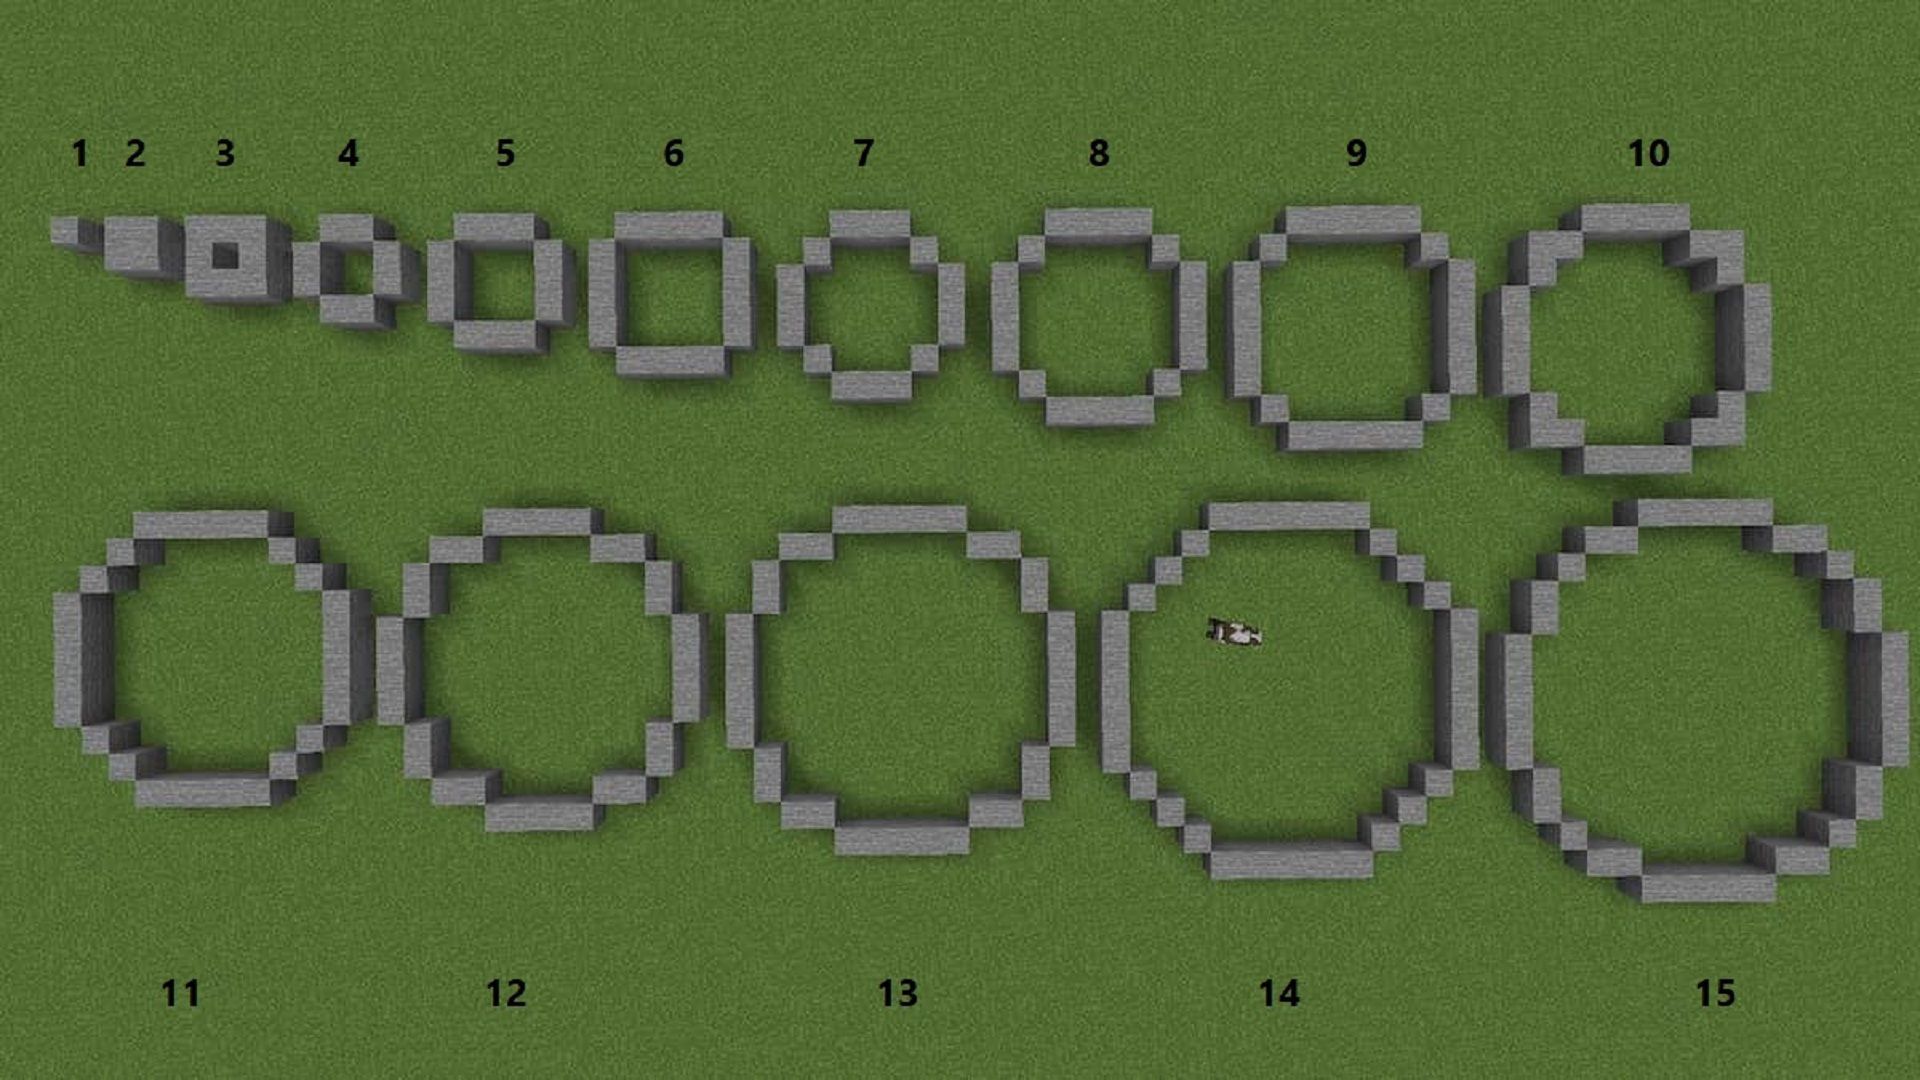
If the process with a 15x15 circle is too complex to start off with, players can begin with a smaller design such as a 7x7 until they get the feeling of block placement down. Once players are more comfortable, they can start to expand outwards and shouldn't encounter any issues.
By simply repeating the process of dropping down and building rows out towards each leg of the plus sign, players can feasibly create as large of a circle as they require for a circular build project.
For additional assistance, players can always opt for third-party tools like Donat Studios' pixel circle generator at https://donatstudios.com/PixelCircleGenerator. This tool will assist Minecraft fans in visualizing exactly where they need to place each block to create the ideal circle that they require for a build.
Obsessed with Crosswords, Wordle, and other word games? Take our quick survey and let us get to know you better!
