
'%20x='0'%20y='0'%20height='100%25'%20width='100%25'%20%0A%20%20%20%20%20%20%20%20%20%20xlink%3Ahref='data:image/jpg;base64,/9j/2wBDAAYEBQYFBAYGBQYHBwYIChAKCgkJChQODwwQFxQYGBcUFhYaHSUfGhsjHBYWICwgIyYnKSopGR8tMC0oMCUoKSj/2wBDAQcHBwoIChMKChMoGhYaKCgoKCgoKCgoKCgoKCgoKCgoKCgoKCgoKCgoKCgoKCgoKCgoKCgoKCgoKCgoKCgoKCj/wgARCAAFAAoDASIAAhEBAxEB/8QAFgABAQEAAAAAAAAAAAAAAAAAAAQG/8QAFQEBAQAAAAAAAAAAAAAAAAAAAAT/2gAMAwEAAhADEAAAAMdYSP/EACAQAAAFAwUAAAAAAAAAAAAAAAECAwUSAAQGJFKR0fL/2gAIAQEAAT8AcMgczOLizDdqQmoBFNsfNEzZ7gGuW5Dqv//EABkRAQACAwAAAAAAAAAAAAAAAAECAwAEgf/aAAgBAgEBPwDbutrRhJO5/8QAGBEAAgMAAAAAAAAAAAAAAAAAAAIBEjL/2gAIAQMBAT8Aor6g/9k='%3E%3C/image%3E%3C/svg%3E)
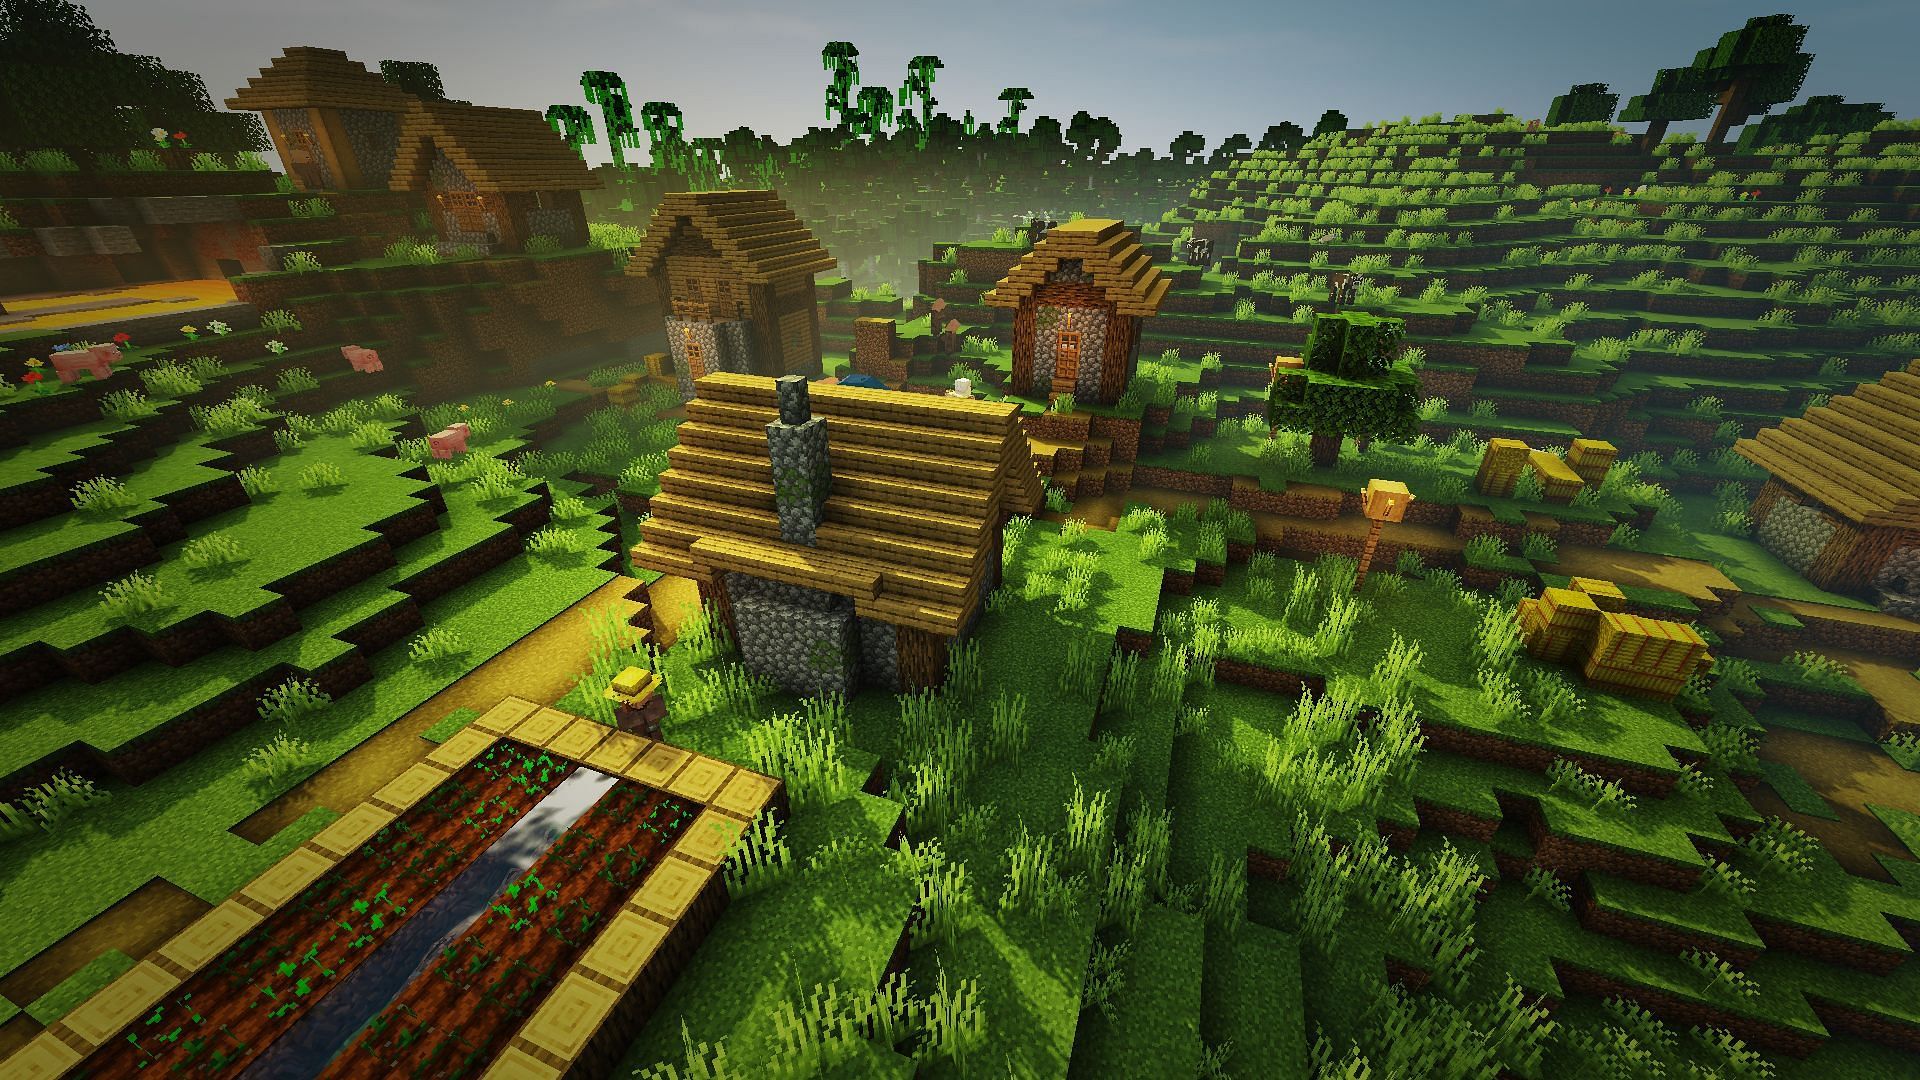
Minecraft's villages are by far the best structure in the game. Villages give access to Minecraft's broken villager trading in the mid and late-game but are also incredible in the early game due to being good sources of loot and food. Some hay bales can be converted into bread, as well as crop farms that the villagers maintain.
If you can resist the temptation to gut all of a village's farms, you can actually convert them into an automatic source of food, both for you to eat and to sustain a Minecraft villager breeder.

Yes, Minecraft villagers can farm for you
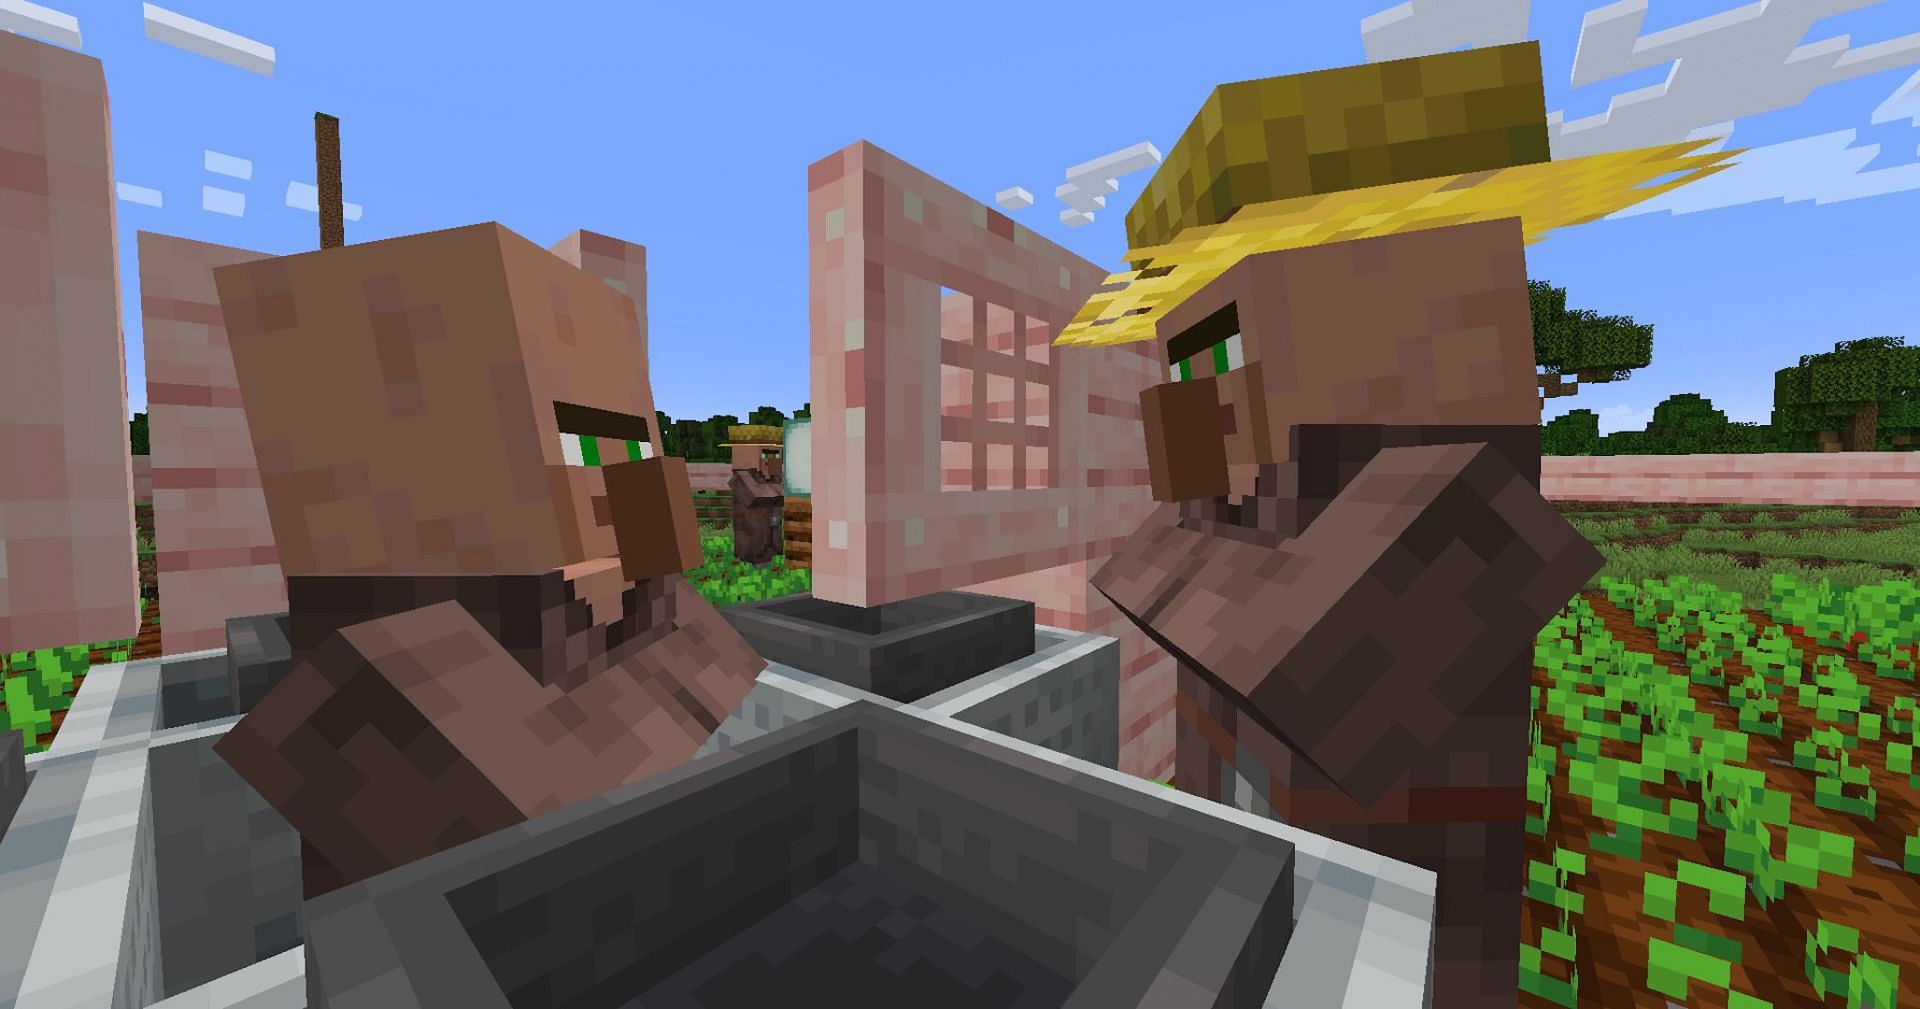
Farmer villagers, considered to have some of the best trades in Minecraft, will maintain the field of crops. This includes breaking ready-to-harvest crops and replanting them in the now-open spot. They do not just leave the items on the ground, though, as they will pick up harvested crops and add them to their inventory.
Whenever a farmer has a surplus of food, they will share it with other villagers, tossing it towards them. It is this action that can be exploited to make the villagers farm for you instead. If you build a farm up in such a way, as the example build below designed by Eyecraftmc has, to block this throw, you can instead collect the spoils for yourself.
How to make villagers farm for you
1) Prep work
Other than the resources needed to make the farm, you'll need to decide where you want to build it. Building it level with the ground will make it easier to add villagers, but it will also require mining out an area for the collection system. You could also build it in the air, which means no mining but will make adding villagers slightly more annoying.
2) Build the collection area
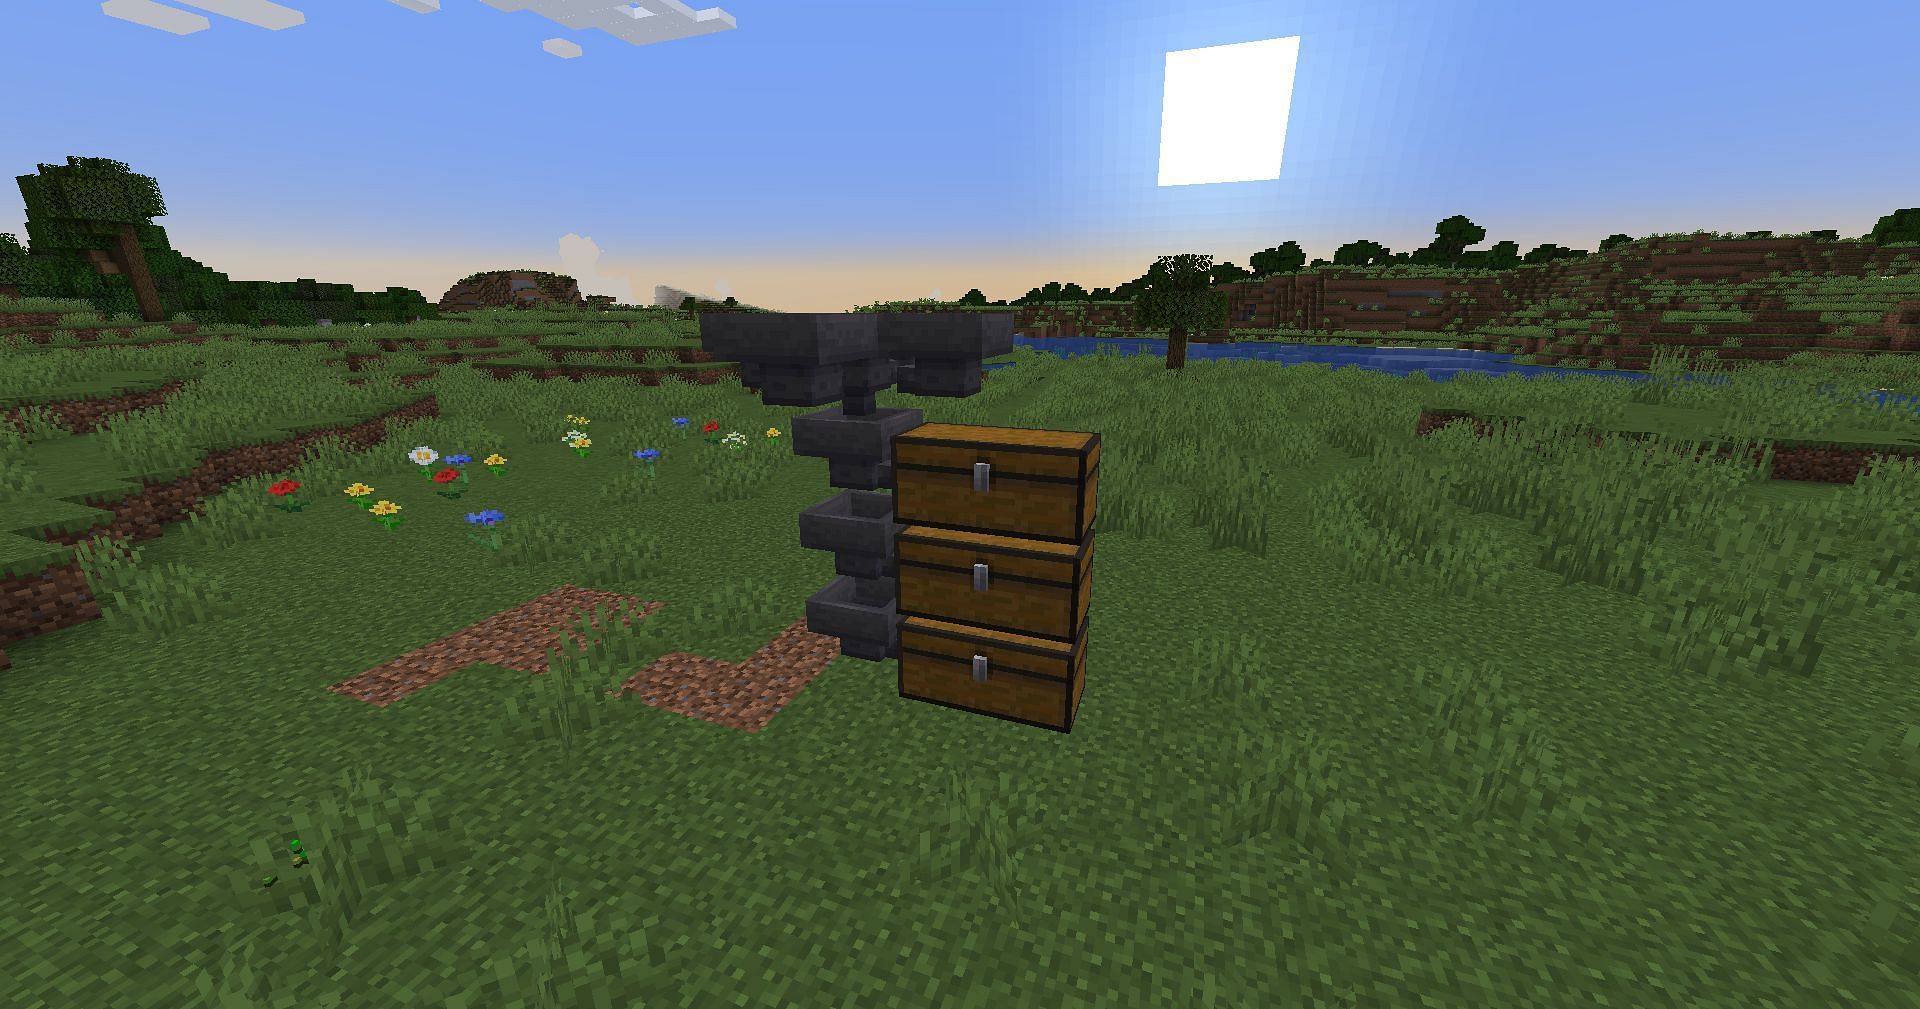
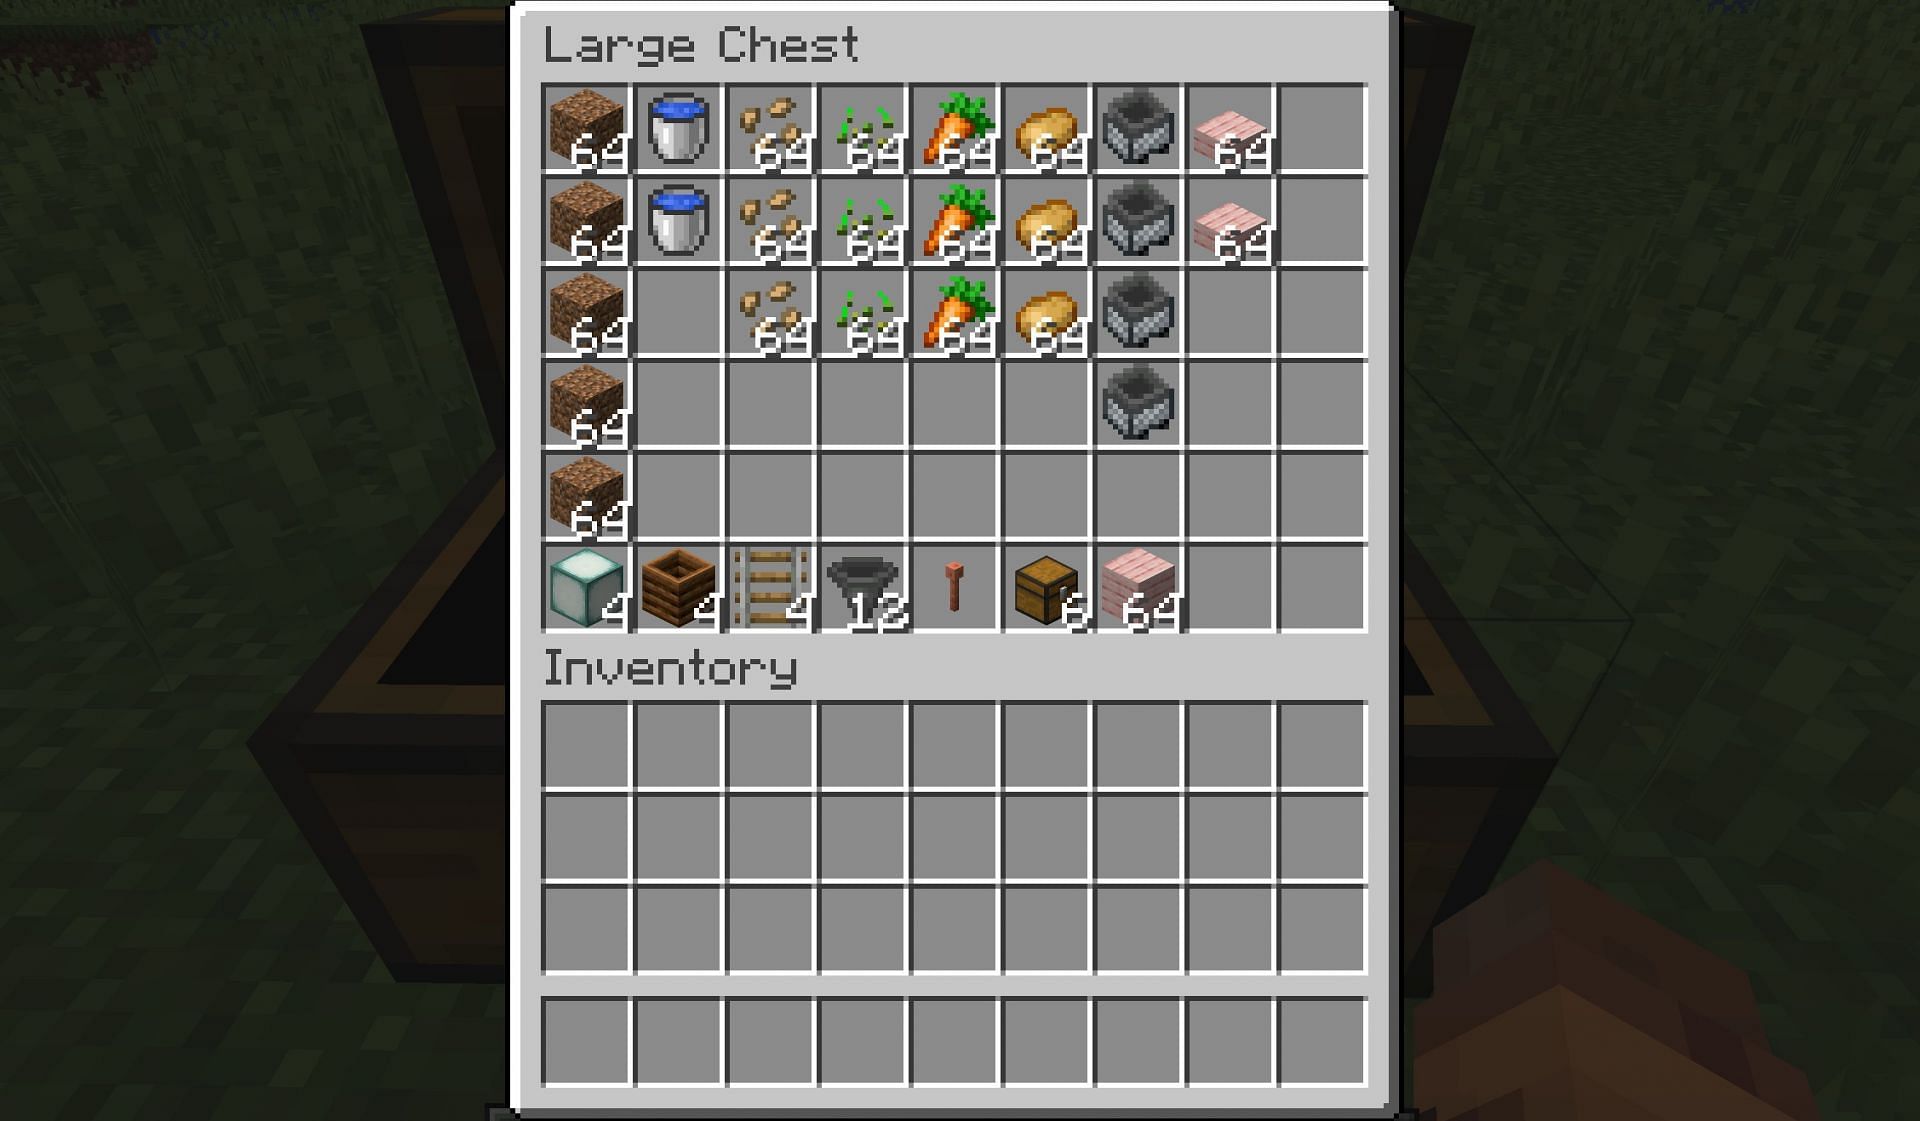
The collection area functions as the center of the farm and thus makes a natural place to start, as you'll be able to build out from here. Build up however many double chests of storage you want the farm to have, connected via Minecraft's hoppers.
When you get to the top of the storage chain, place a final hopper without any chests and build up a small platform of connected hoppers, oriented so that they all feed into the storage hopper chain.
3) Build up the farms
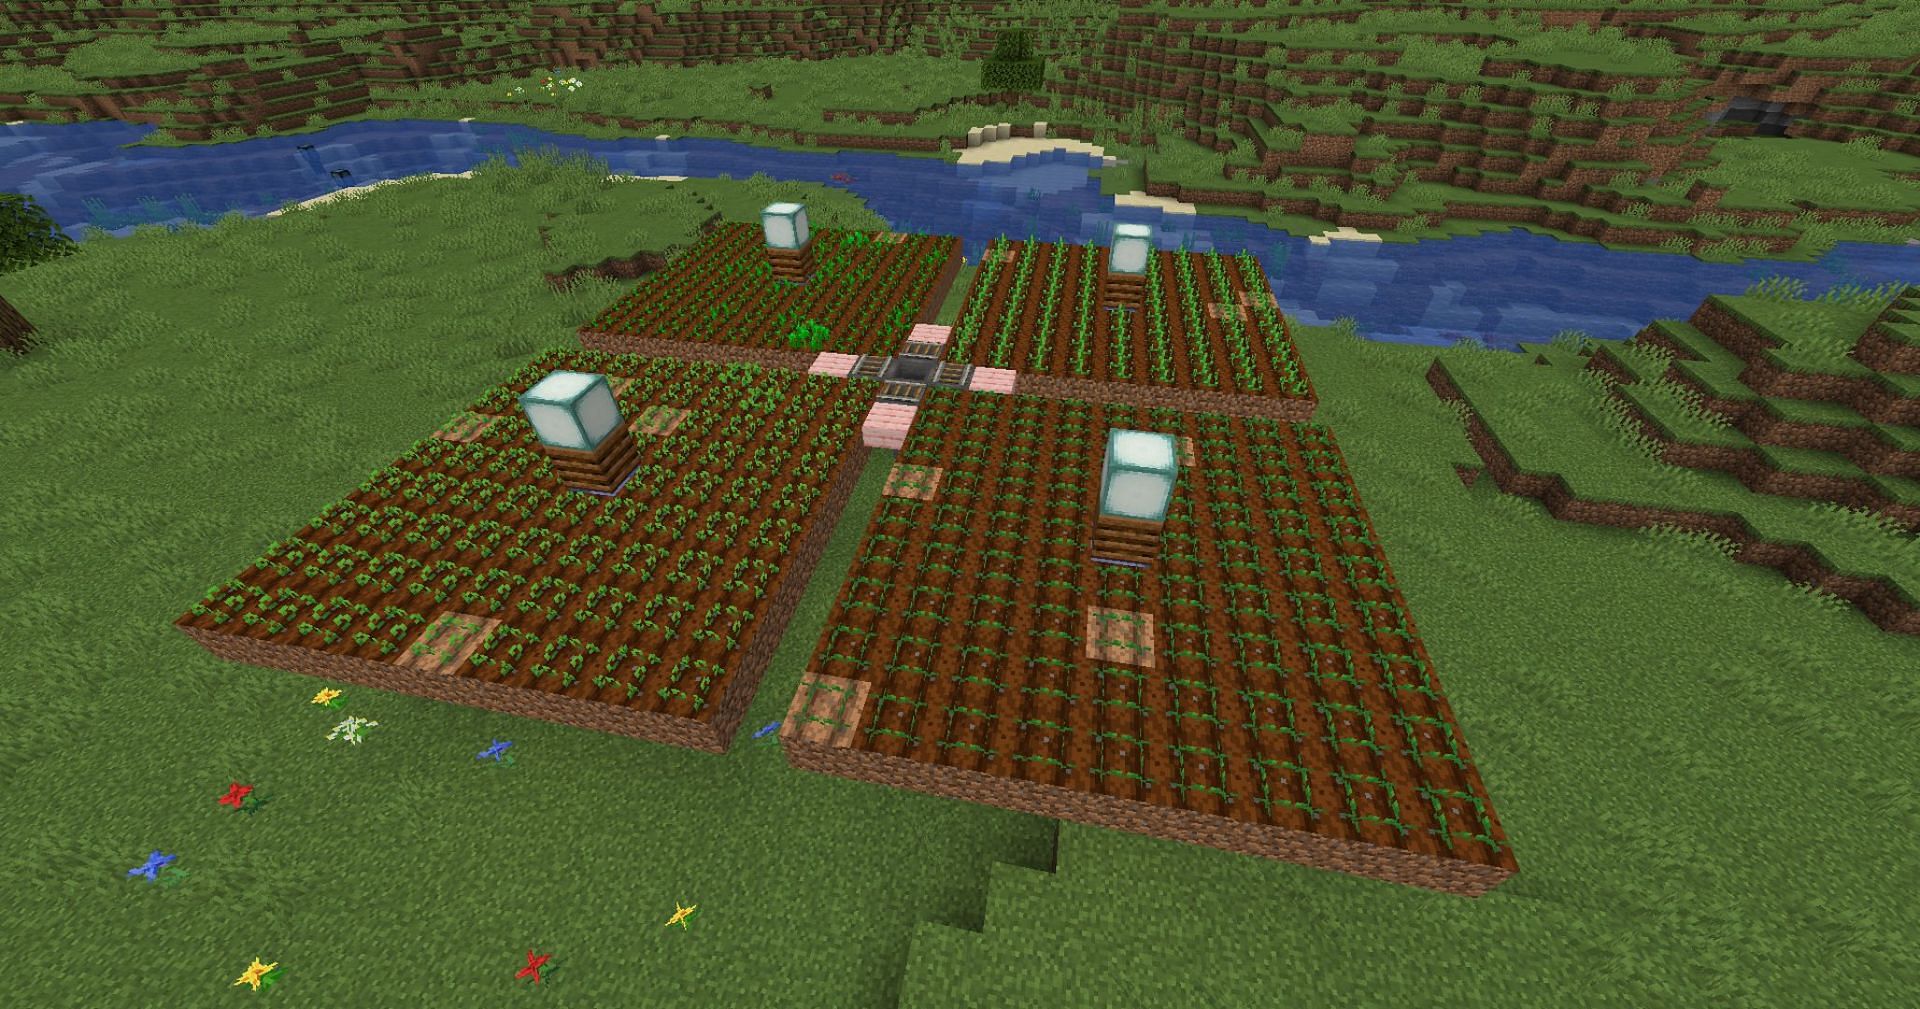
Next, you'll need to fill the corners of this hopper plus sign with dirt and build out nine blocks, eventually creating four nine-by-nine dirt platforms. These are where the crops will be grown. Leave the center block empty for a water source block. Place a bottom slab to contain the water, and then waterlog it. This will leave the bottom of the farm nice and flat while still giving the crops water.
Then, place a composter, one of the many workstations for Minecraft villager professions, on top of this water source block, with a light source above. This will give the farmer their workstation and the crops a light source, all while not taking any space away from the crops, as it is directly above the water.
The last step to setting up the farms is to convert all the dirt into farmland and then plant whatever crops you want to farm. Since there are four sections, the example build uses a quadrant for carrots, one for potatoes, one for wheat, and one for beetroot so that the farm will produce all the crops it can.
4) Divide the farms
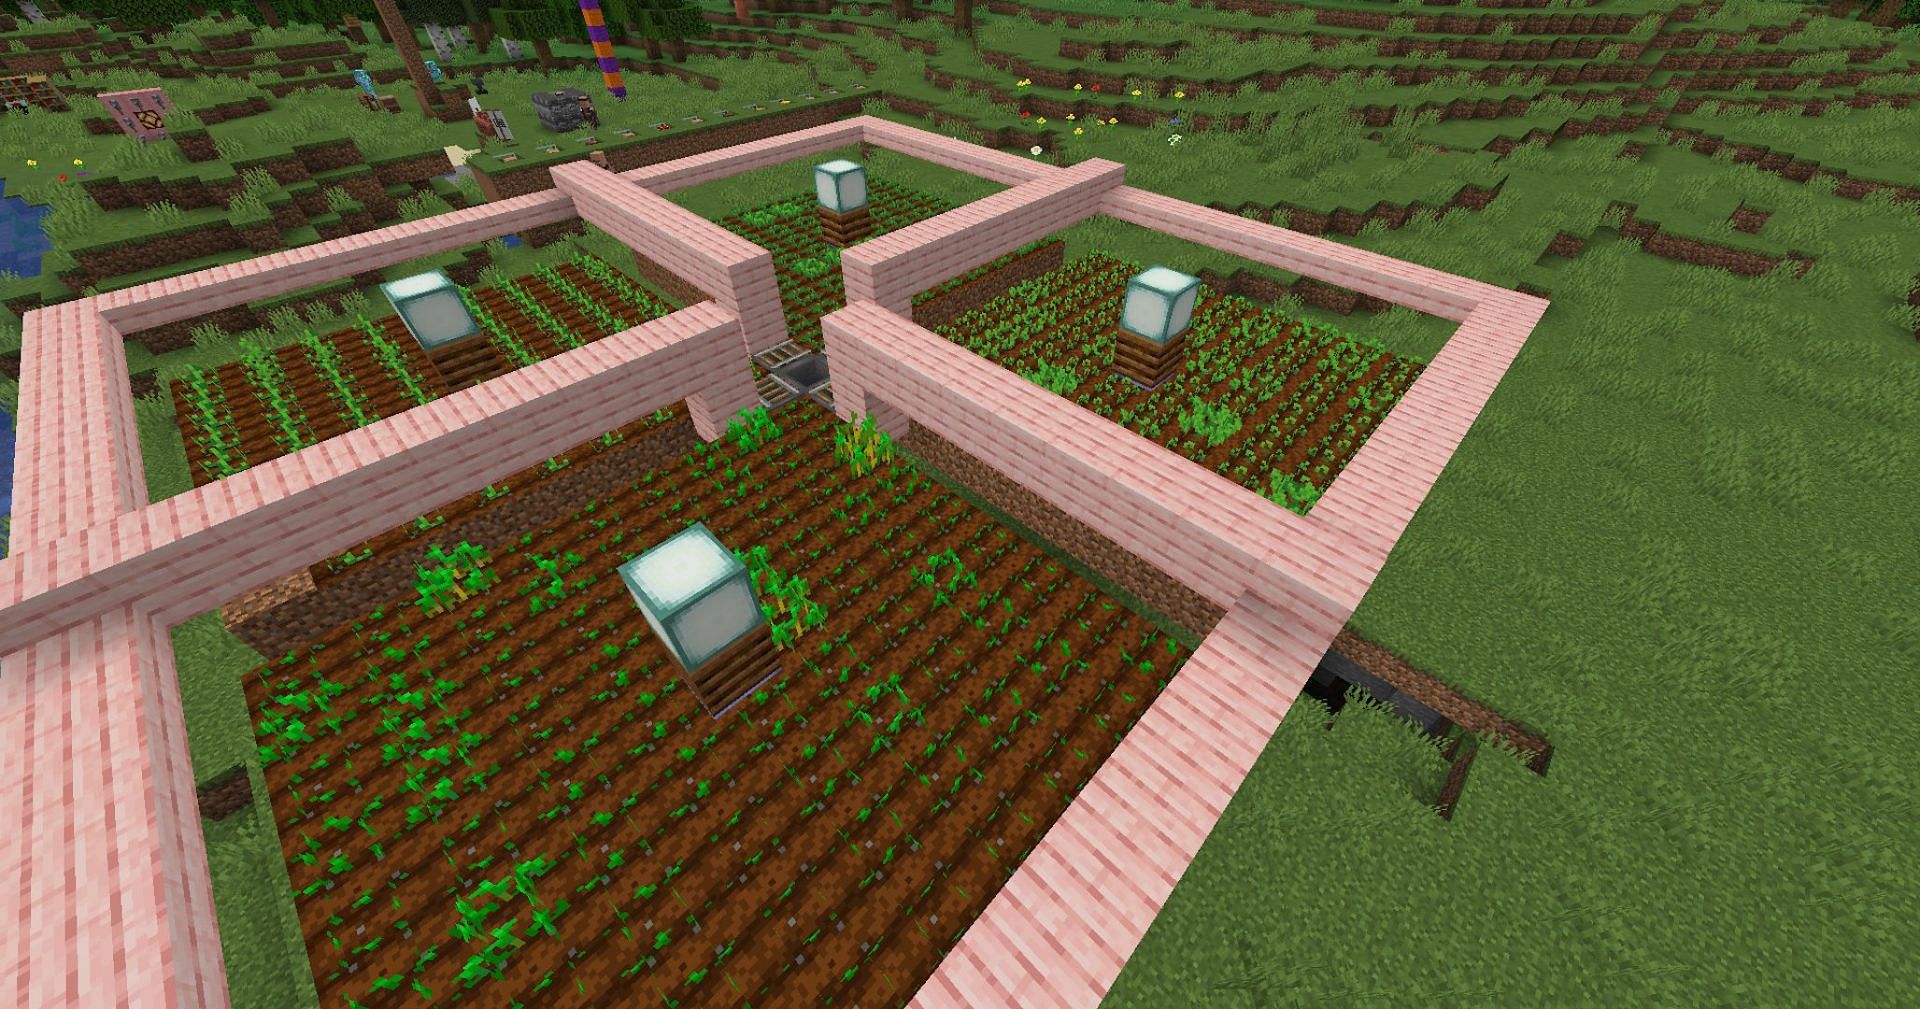
Next, you will need to build this Minecraft farm's walls so that the only place for farmers to throw their crop harvests is the collection area in the center. Build up a full block wall at head height, separating each farm, and then circle the farm with half slabs to create a spawn-proof shell to contain the villagers.
5) Prepare for villagers
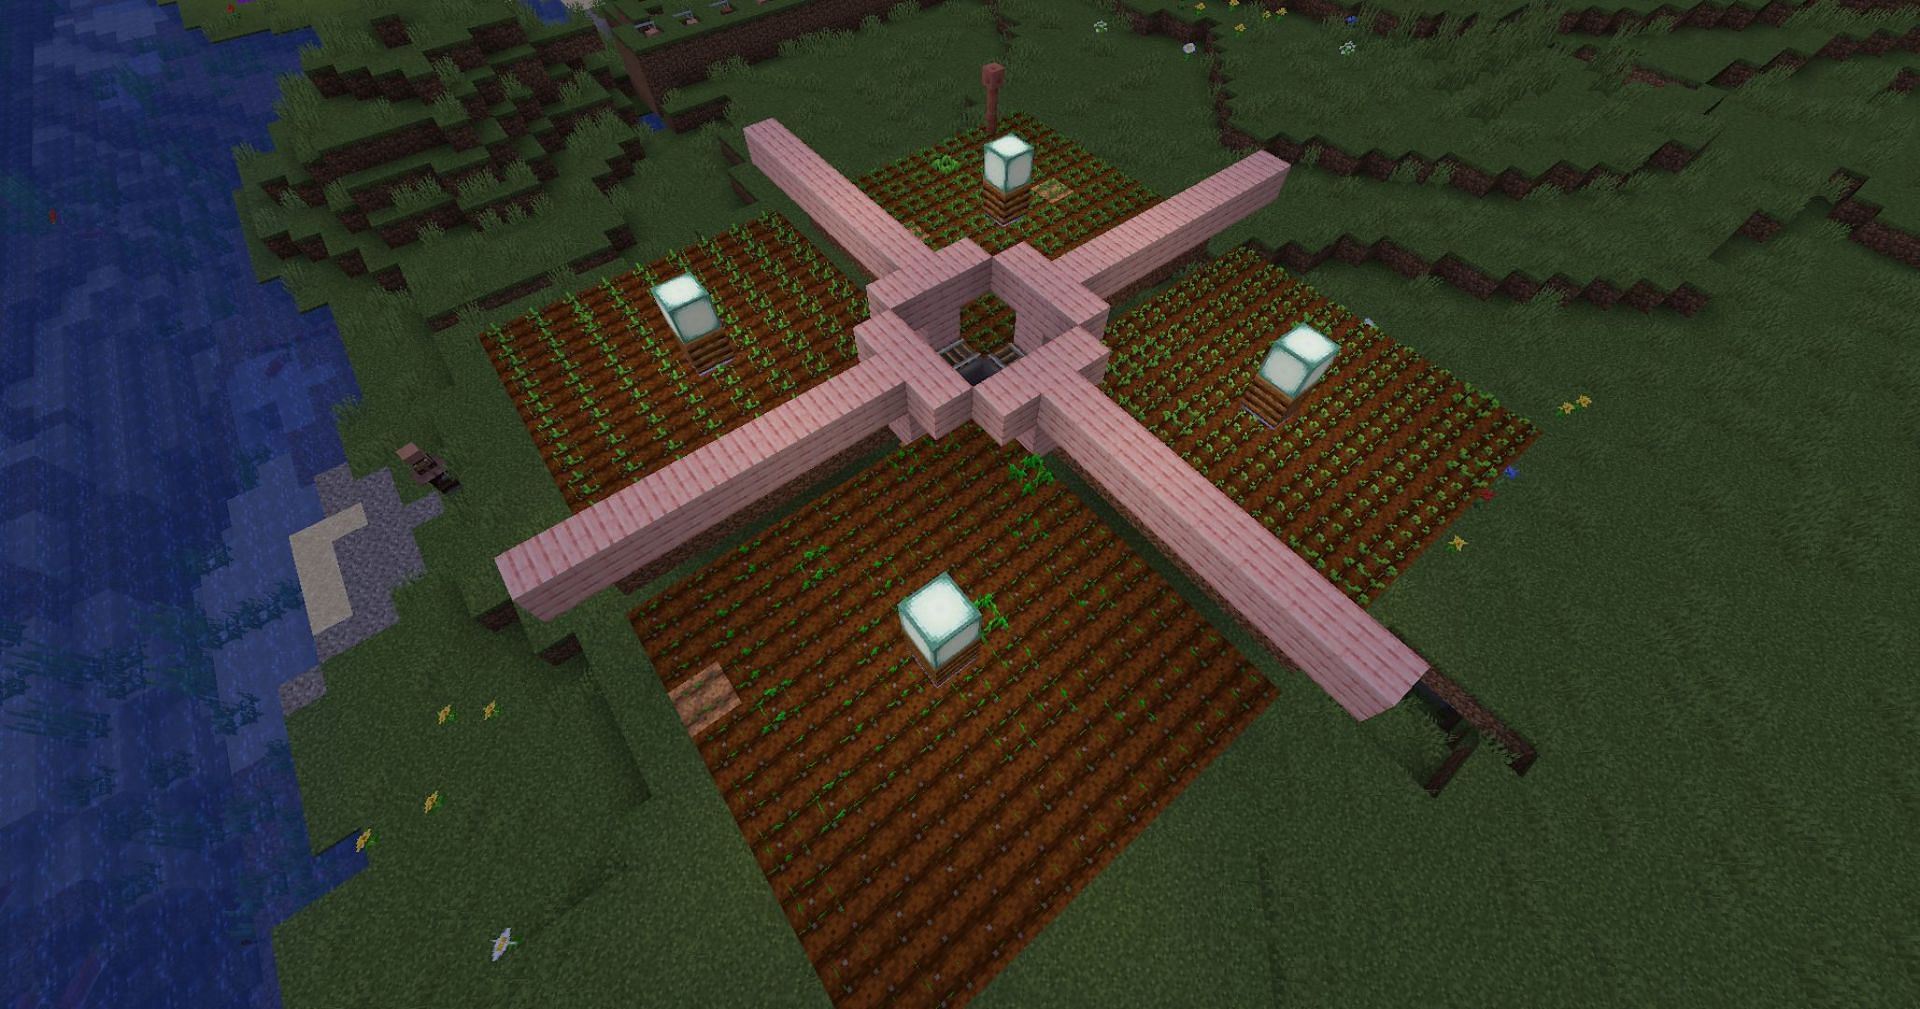
These next steps are vital for making sure the villagers stay where they are supposed to, as well as keeping them safe. Add rails above each outer hopper, and then place a lightning rod seven blocks above the center hopper.
This should protect the entire farm from lightning, which is useful if you built it out of flammable blocks, but also to prevent villagers from being converted into witches since villagers are one of the few Minecraft mobs changed by lightning.
6) Add in the villagers
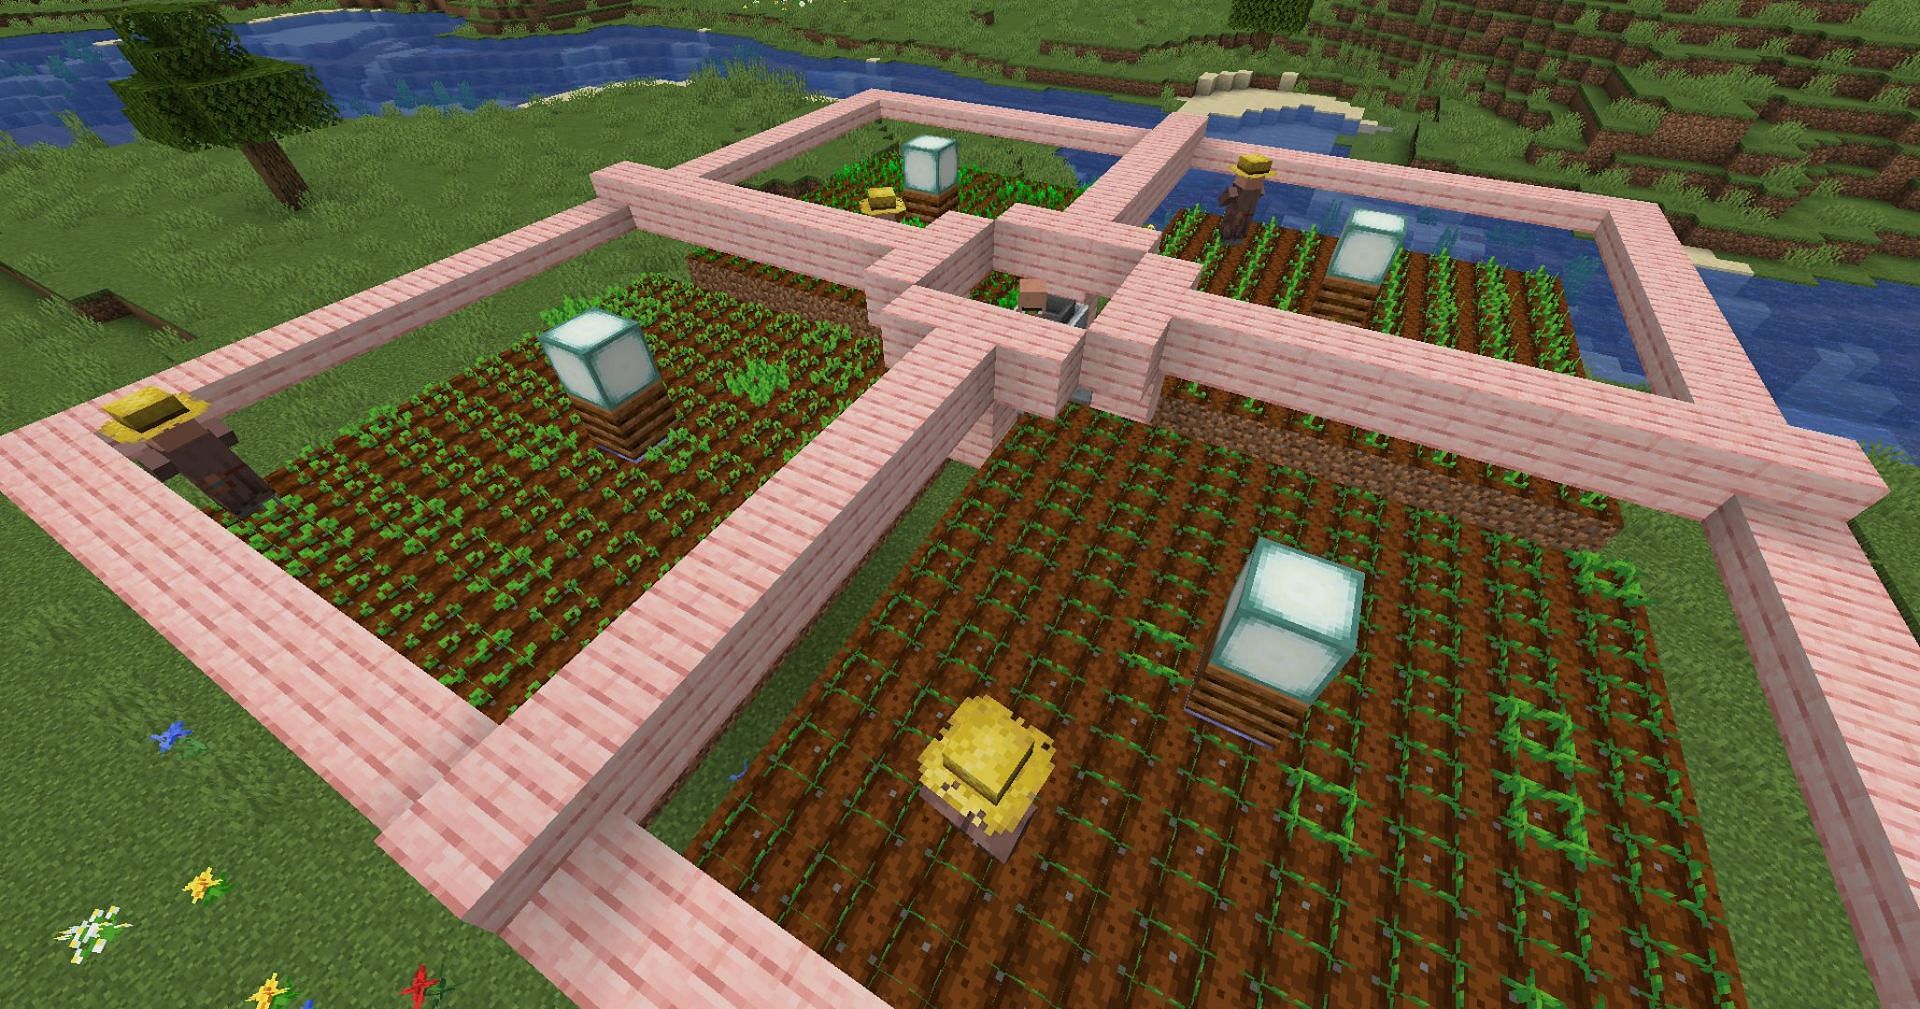
Moving villagers in Minecraft is one of the most frustrating things to do, but it is sometimes unavoidable. An unemployed villager needs to be placed in each farming quadrant. This can be done by any means you prefer. If the farm is on ground level, boats would be the easiest way, but an elevated farm might require railway systems utilizing Minecraft's powered rails or piston chains to push boats upwards.
7) Finish the farm
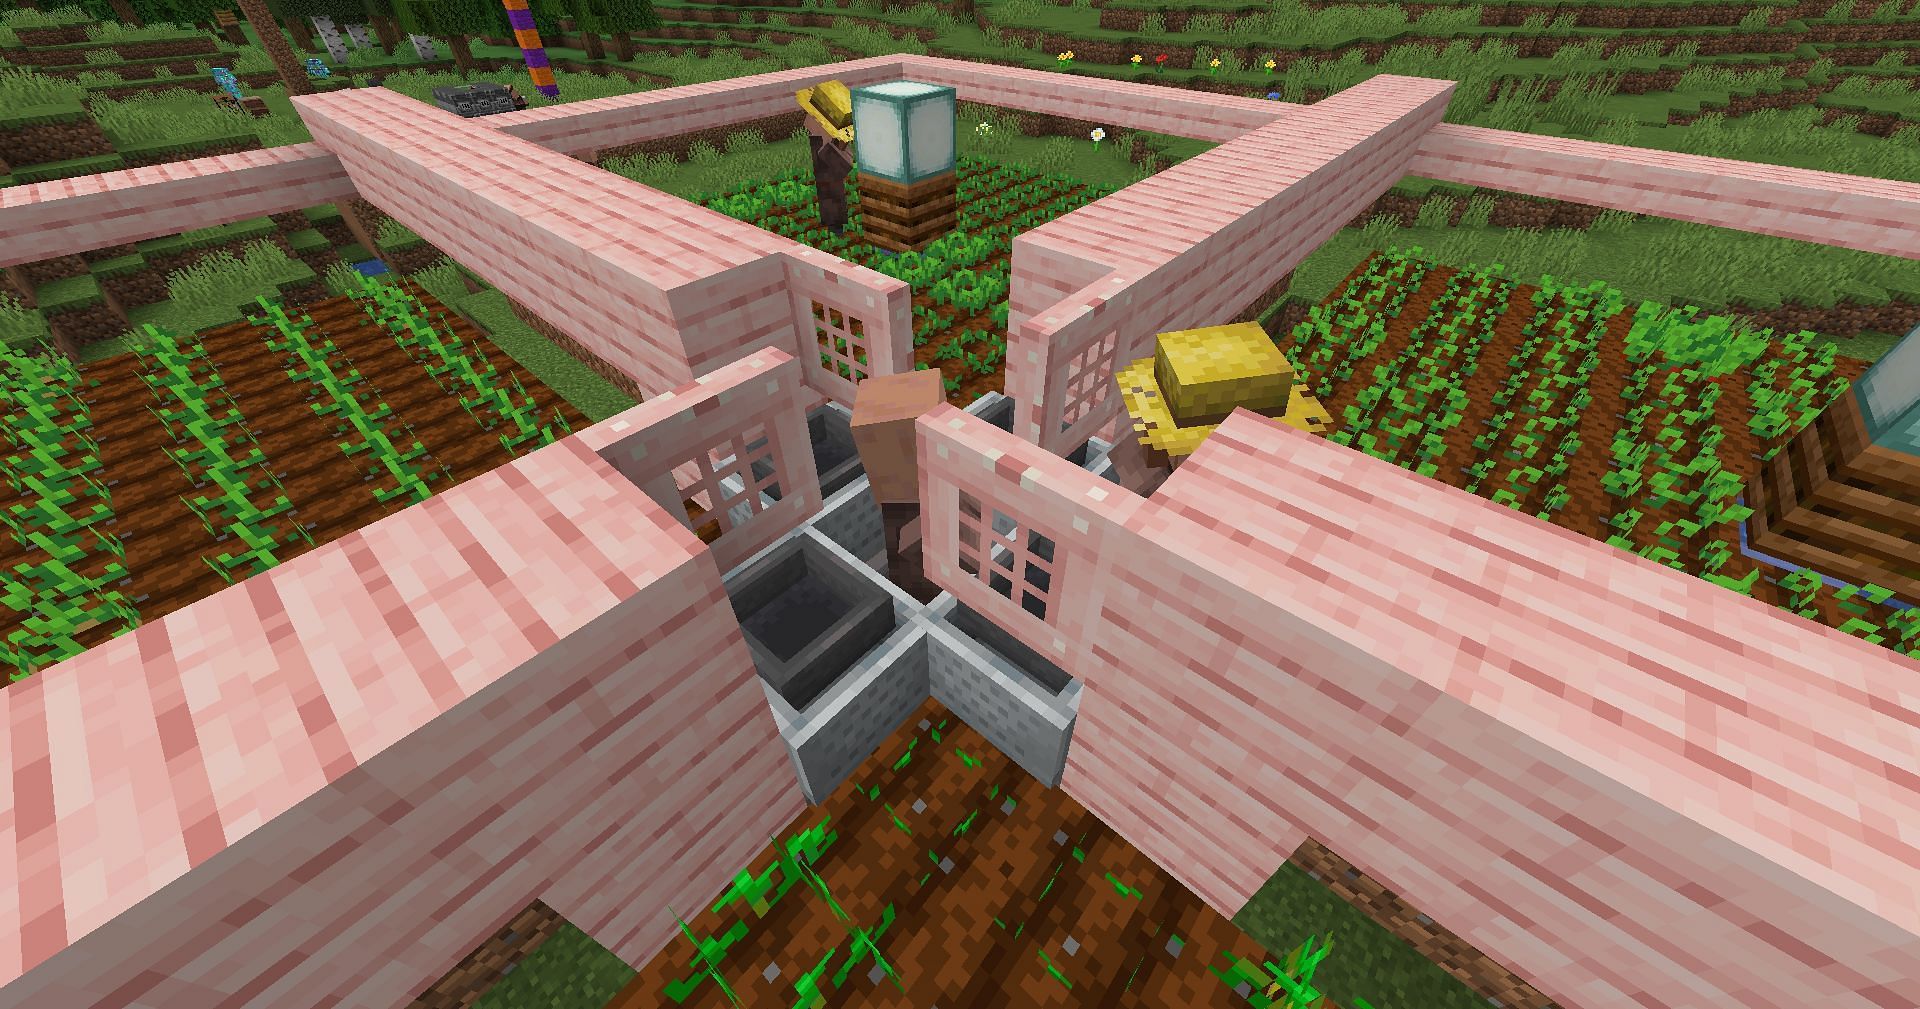
The fifth villager must be added above the center hopper, with the rails stopping them from moving, as mobs cannot pathfind over rails. Place temporary blocks blocking their line of sight until the farm is complete. This will stop any wandering farmers from ending up in the wrong section.
Place minecarts with hoppers on each rail next to the center hopper. These must be perfectly centered, so nudge the center villager until they don't bump any of the minecarts. Then, trapdoors should be placed so that, when closed, they will deflect items into the hoppers, as well as block lines of sight for other farmers.
If done correctly, crops thrown to the center villagers will hit the trapdoors and fall into the collection system.
Since all of the crops produced by the farm can be sold directly back to the farmers within, it might be worth building this farm next to your Minecraft villager trading hall to make spending these gained emeralds more convenient.
Obsessed with Crosswords, Wordle, and other word games? Take our quick survey and let us get to know you better!
