

'%20x='0'%20y='0'%20height='100%25'%20width='100%25'%20%0A%20%20%20%20%20%20%20%20%20%20xlink%3Ahref='data:image/jpg;base64,/9j/2wBDAAYEBQYFBAYGBQYHBwYIChAKCgkJChQODwwQFxQYGBcUFhYaHSUfGhsjHBYWICwgIyYnKSopGR8tMC0oMCUoKSj/2wBDAQcHBwoIChMKChMoGhYaKCgoKCgoKCgoKCgoKCgoKCgoKCgoKCgoKCgoKCgoKCgoKCgoKCgoKCgoKCgoKCgoKCj/wgARCAAGAAoDASIAAhEBAxEB/8QAFQABAQAAAAAAAAAAAAAAAAAAAAX/xAAVAQEBAAAAAAAAAAAAAAAAAAADBP/aAAwDAQACEAMQAAAAkzSZP//EACUQAAEDAgMJAAAAAAAAAAAAAAQBAgMFBgARURITFBYhIkFDcv/aAAgBAQABPwA+6qnVKPS5jR2sNGj30/DmOZCS752OzppquOZbq9YluNZ4RYpFyx//xAAYEQEAAwEAAAAAAAAAAAAAAAABAAMEIf/aAAgBAgEBPwB02nBn/8QAFxEAAwEAAAAAAAAAAAAAAAAAAAECE//aAAgBAwEBPwDKWf/Z'%3E%3C/image%3E%3C/svg%3E)
The Talos Principle 2 introduces a distinctive puzzle known as Elegance, which is a part of the Lost Puzzles series. Upon completing the puzzles in the main campaign, you gain access to the Lost Puzzles. Situated in the north, the Elegance puzzle features an intricately designed area. Your primary objective is to interact with the main device, utilizing tools such as the jammer, connector, and fans.
To complete this challenging puzzle, you must create openings in the walls using the driller, subsequently activating switches with the connector. Employ the fan devices strategically to attain jump boosts, allowing you to reach elevated platforms.
This guide aims to assist you in navigating the intricacies of the Elegance puzzle in The Talos Principle 2.

How to solve the Elegance puzzle in The Talos Principle 2
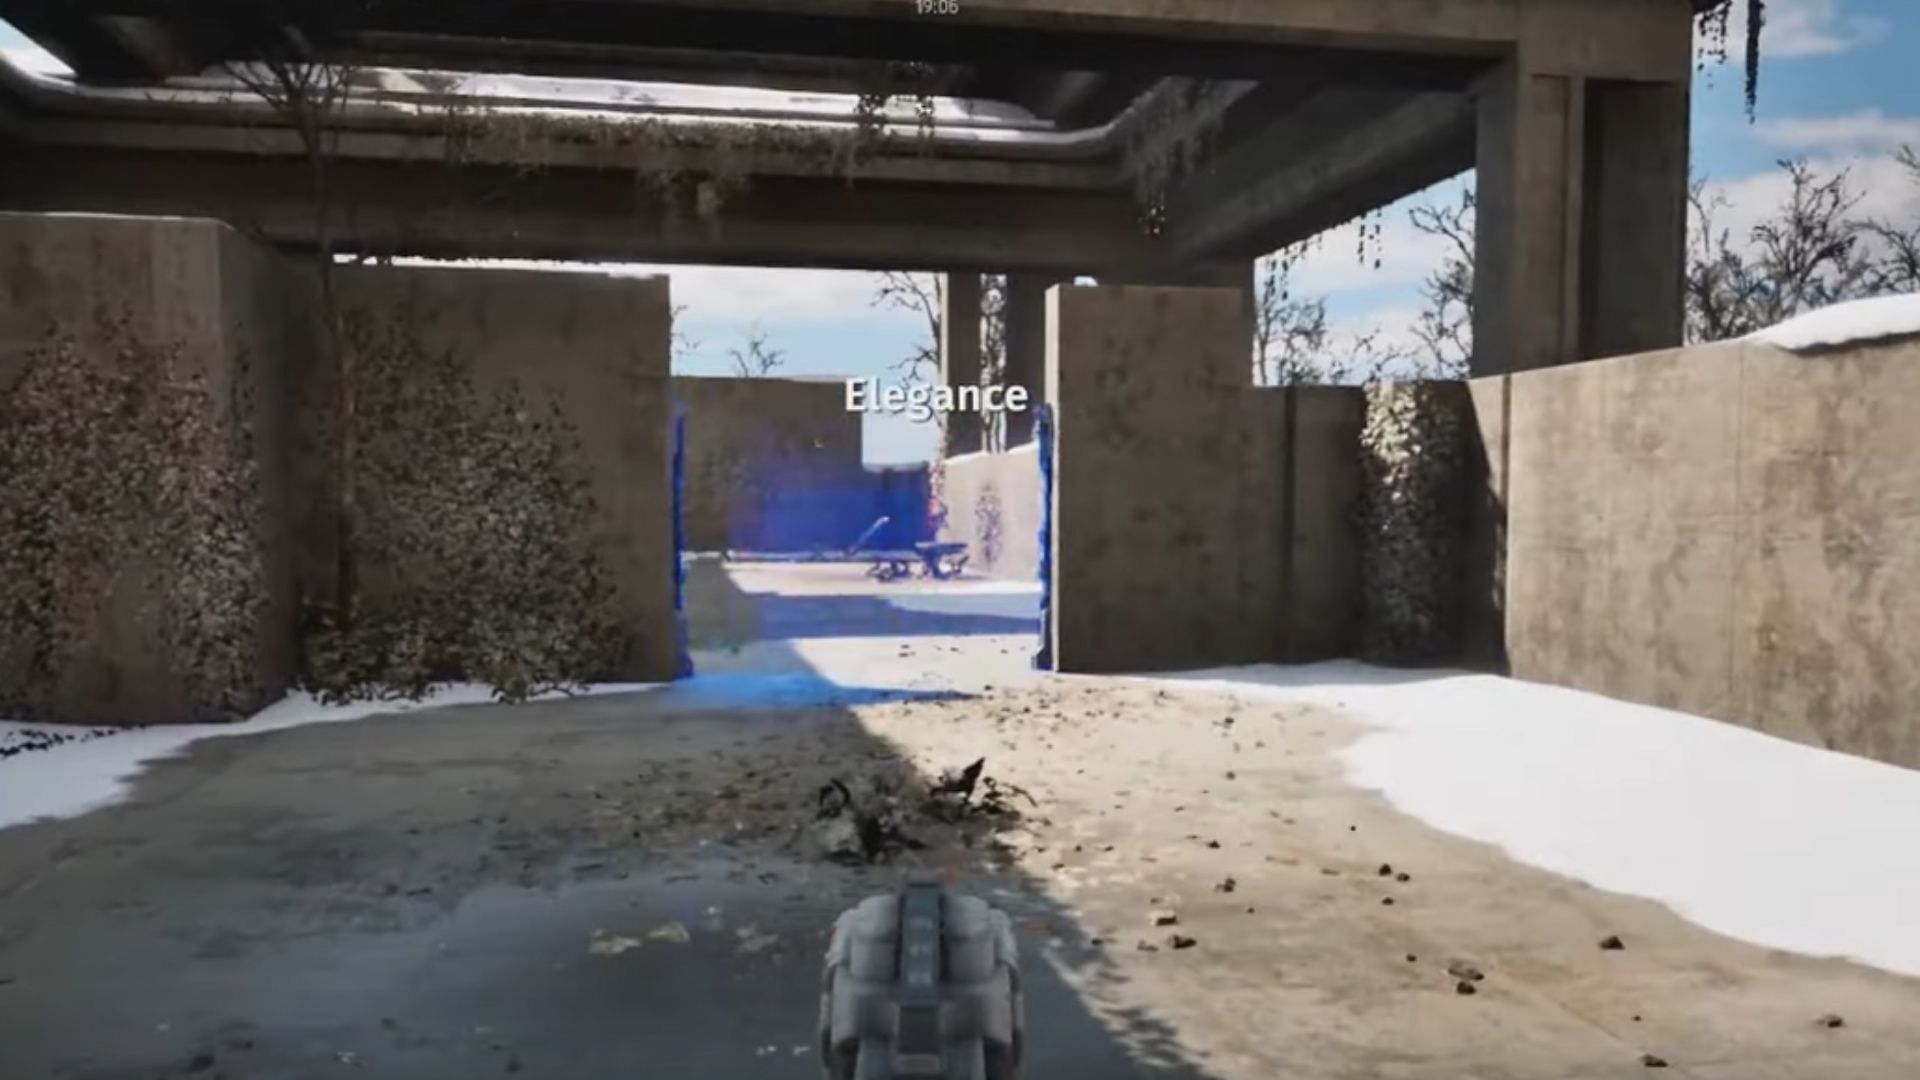
At the beginning of the Elegance puzzle in The Talos Principle 2, you'll encounter a jammer; pick it up and proceed. You'll come across a blue laser barrier. Now, place the jammer in front of it to defuse the barrier.
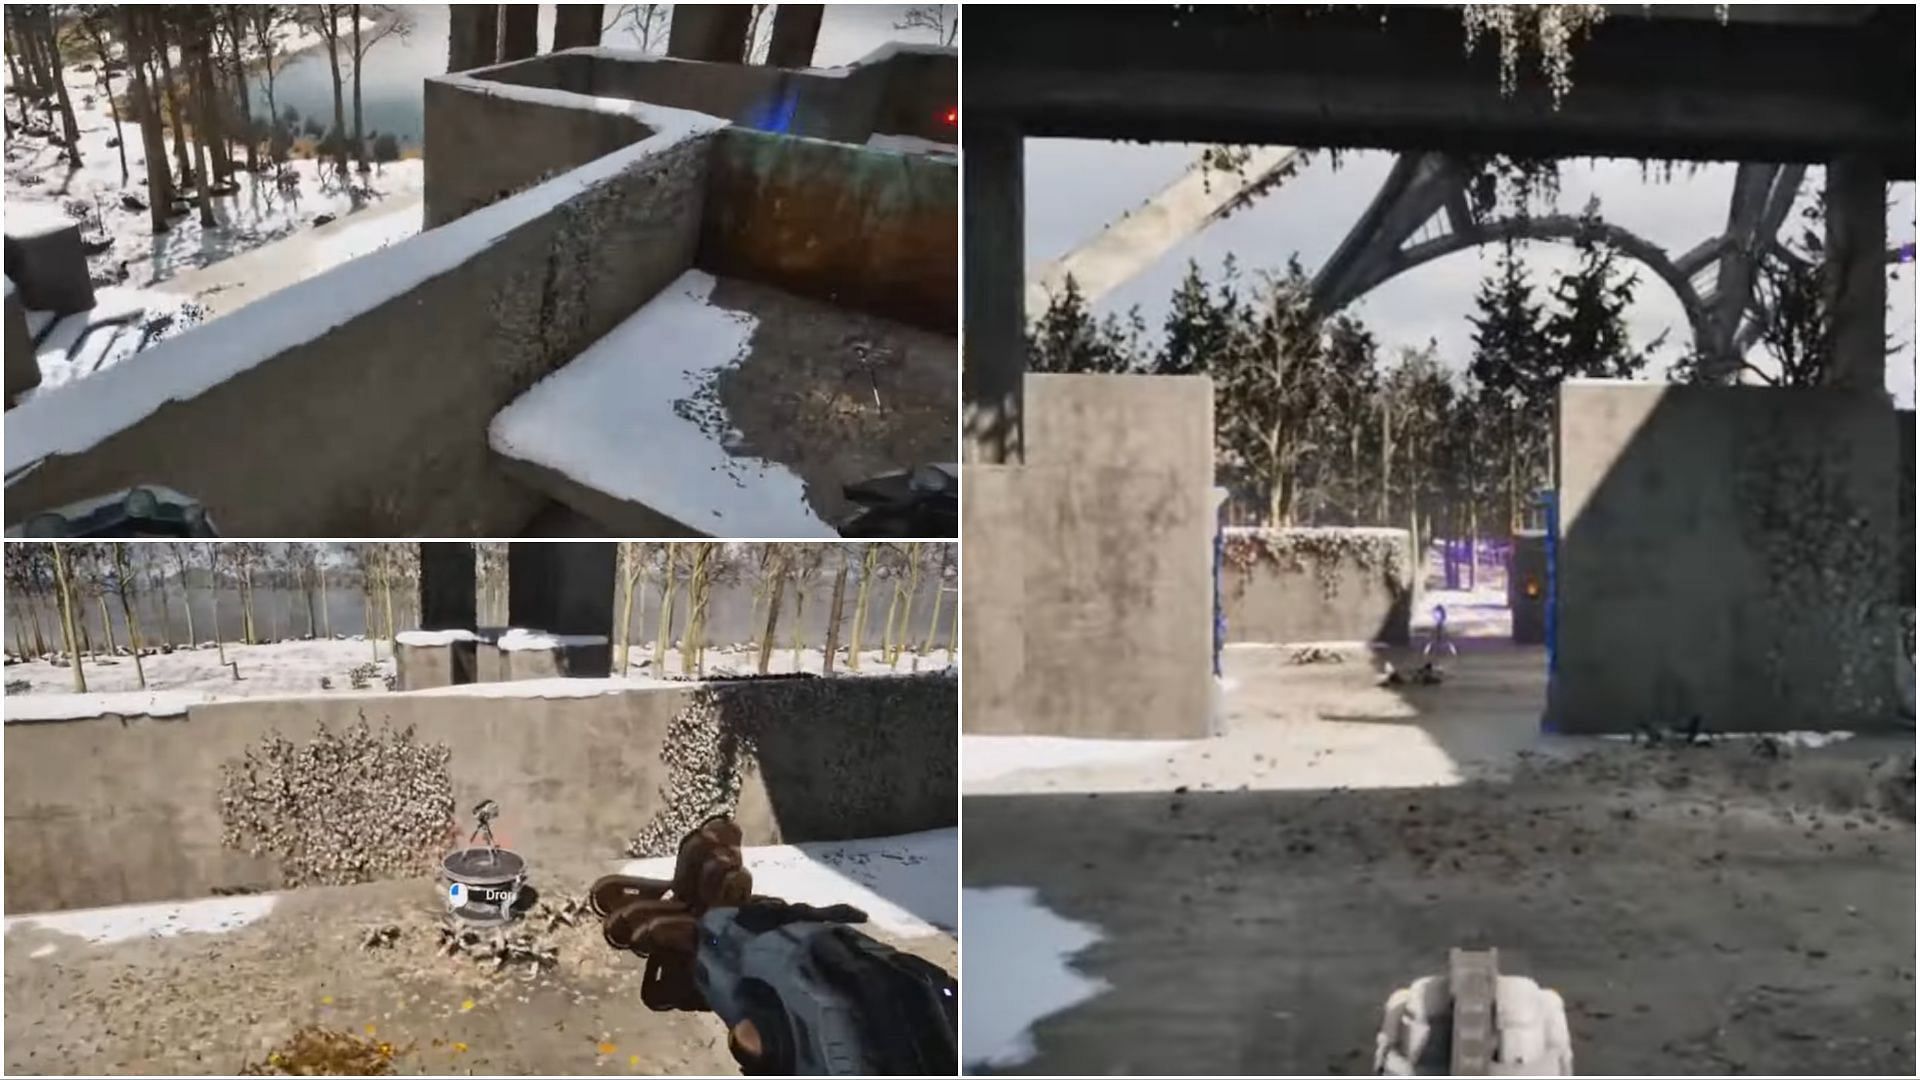
Go further and take a left to locate a fan device. Step into it to reach an elevated platform. On this platform, you will find a driller. Pick it up and descend to the ground.
To your right, you will see a rotating device containing a jammer. Replace the driller with the jammer, turn right, and then position the jammer in front of the previously defused blue laser barrier.
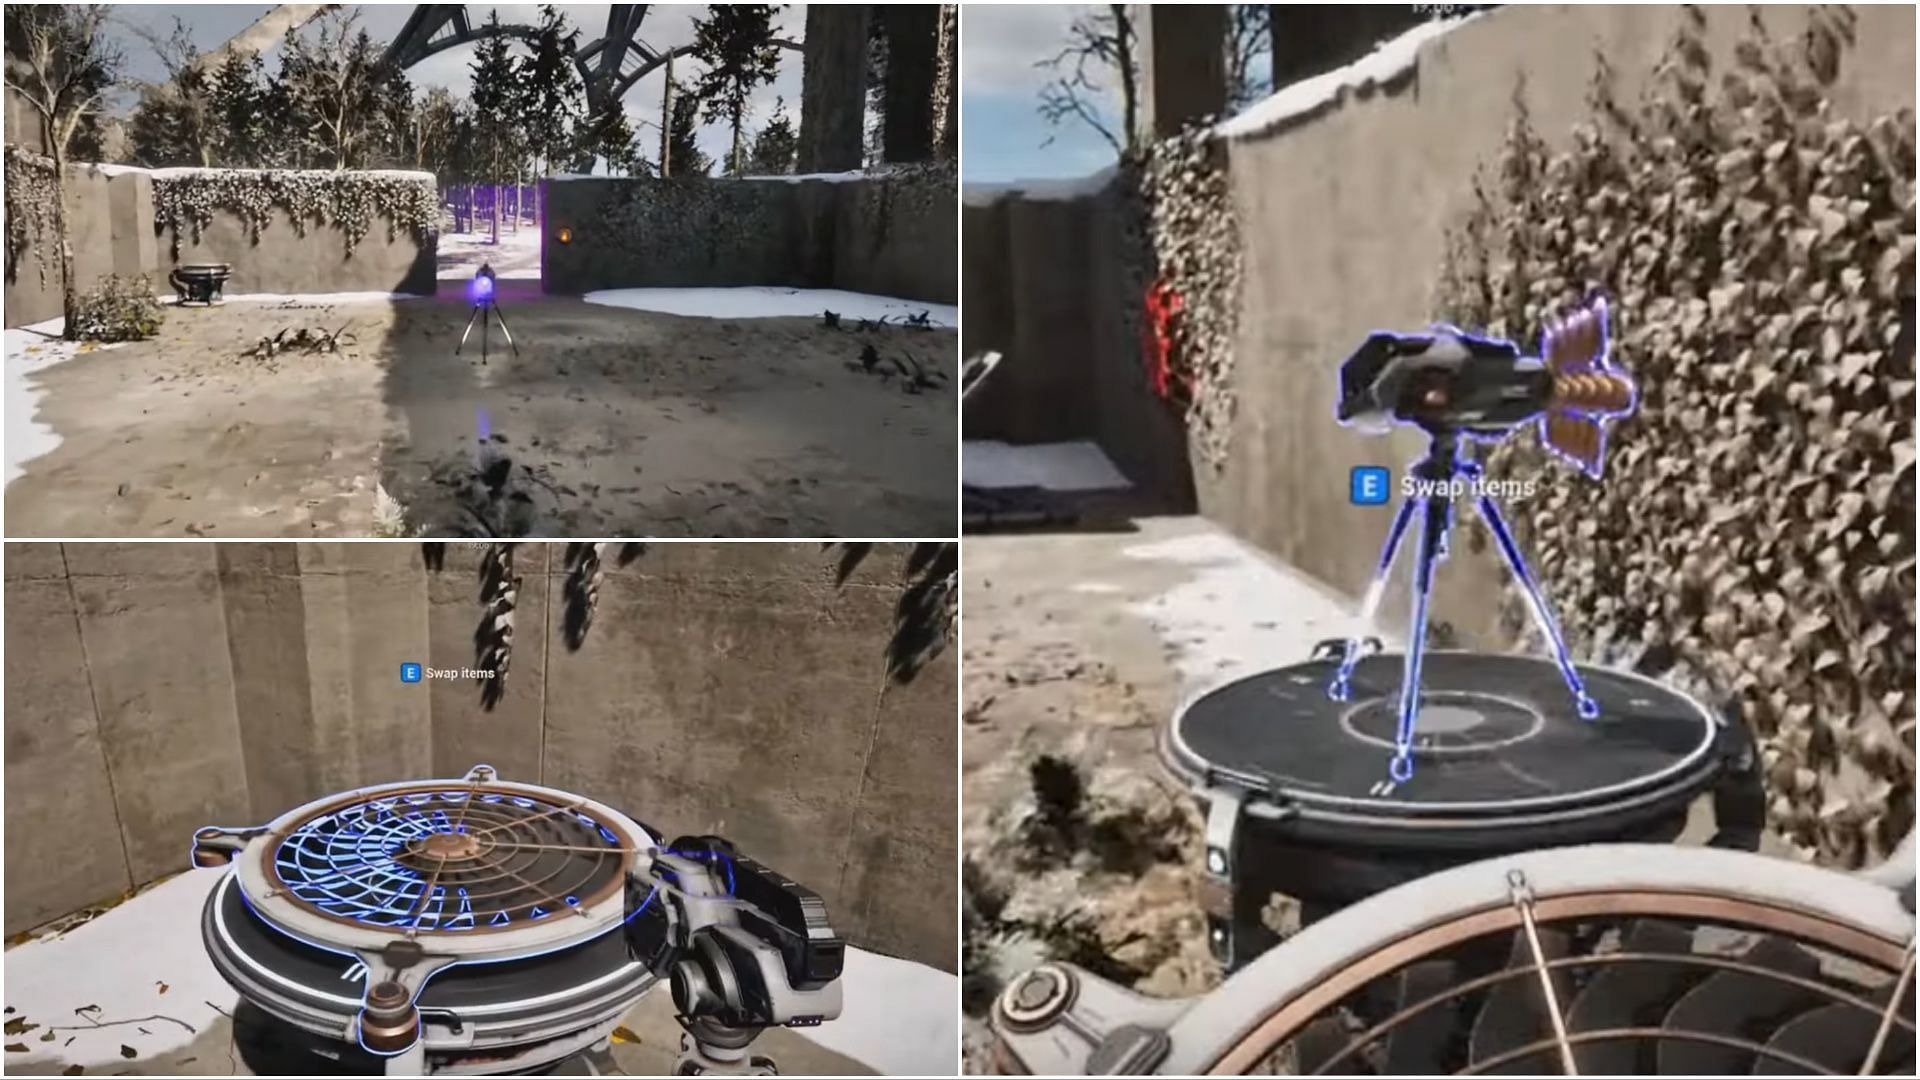
Return to the starting point, retrieve the jammer, and then go towards the left side. In the left corner, you will find another rotating device with fan vents. Exchange the jammer with the fan vents and head back towards the rotating device in which you placed the driller. Swap the fan vents with the driller.
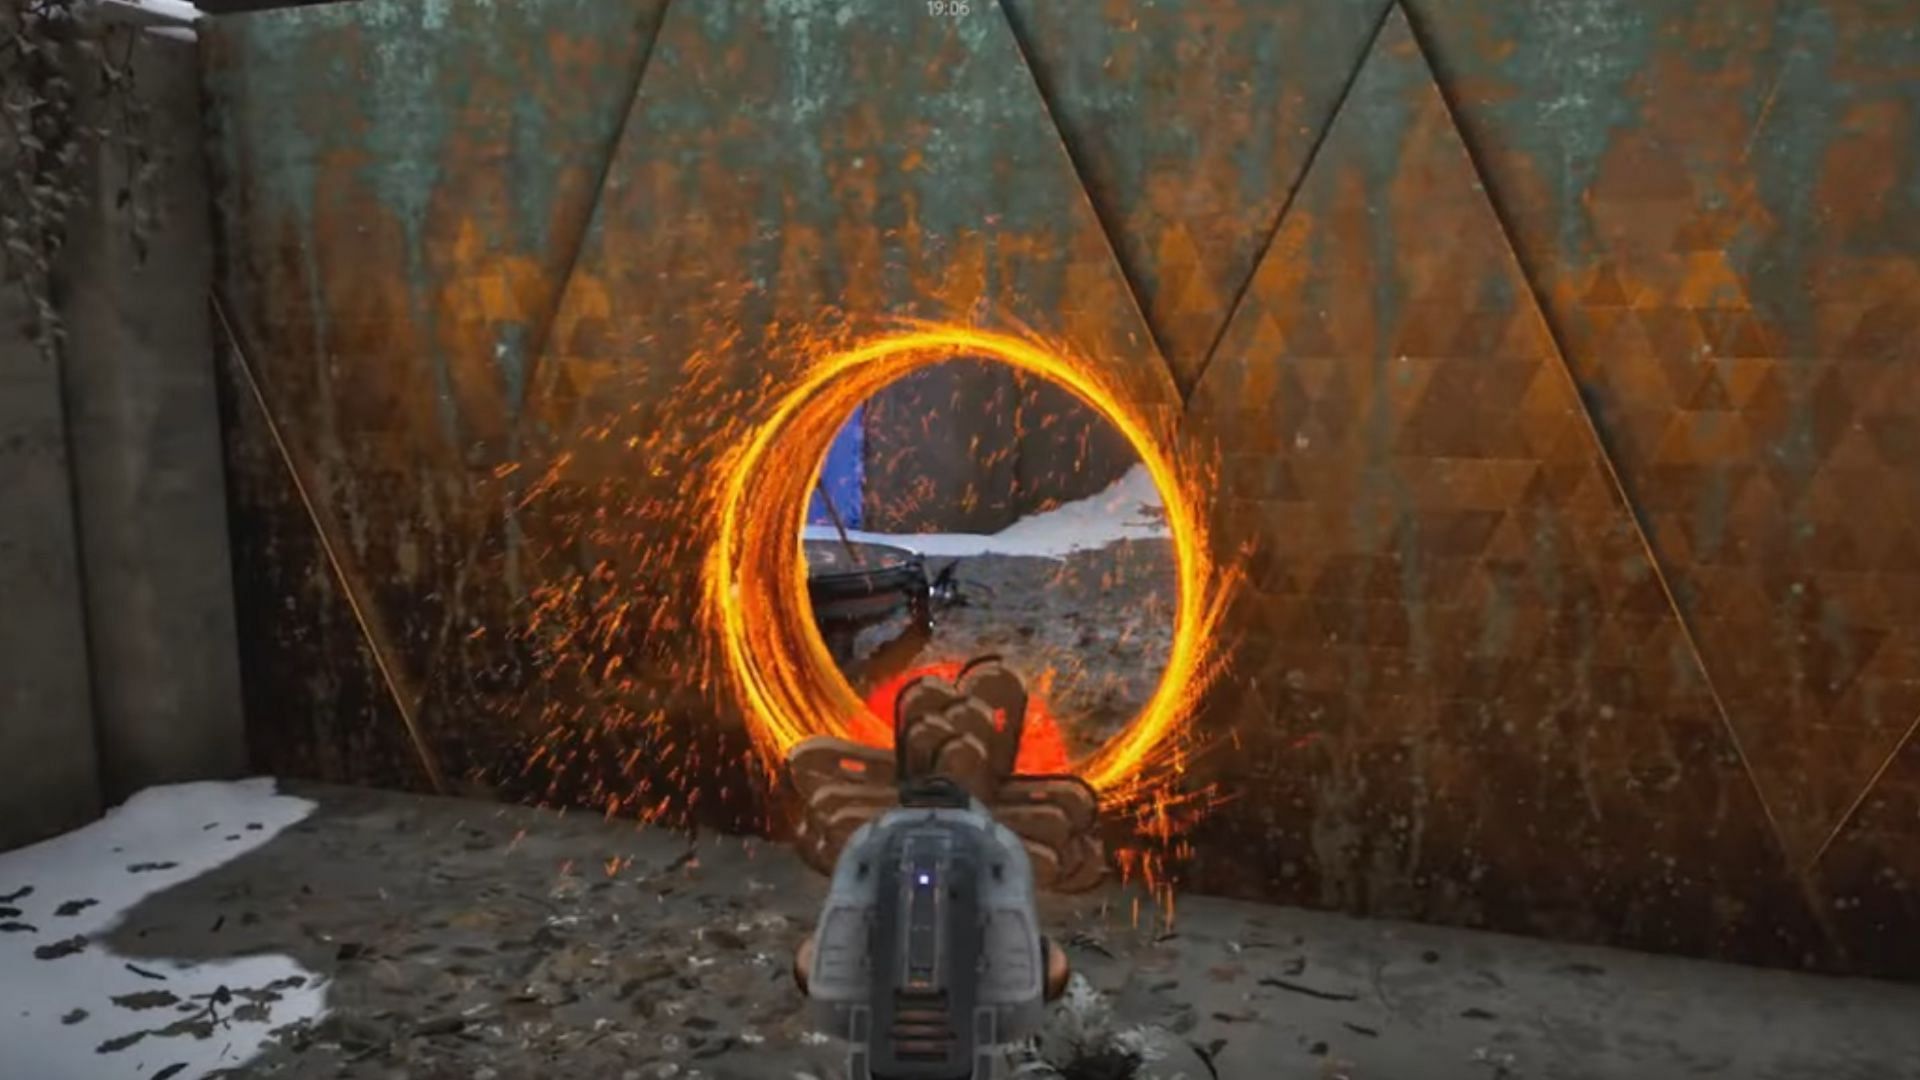
With the driller in hand, head to the corner with the fan device. Step on it to get a jump boost and reach the elevated platform. In front of you, there's a rusted iron wall. Now, you have to utilize the driller to create a hole in it.
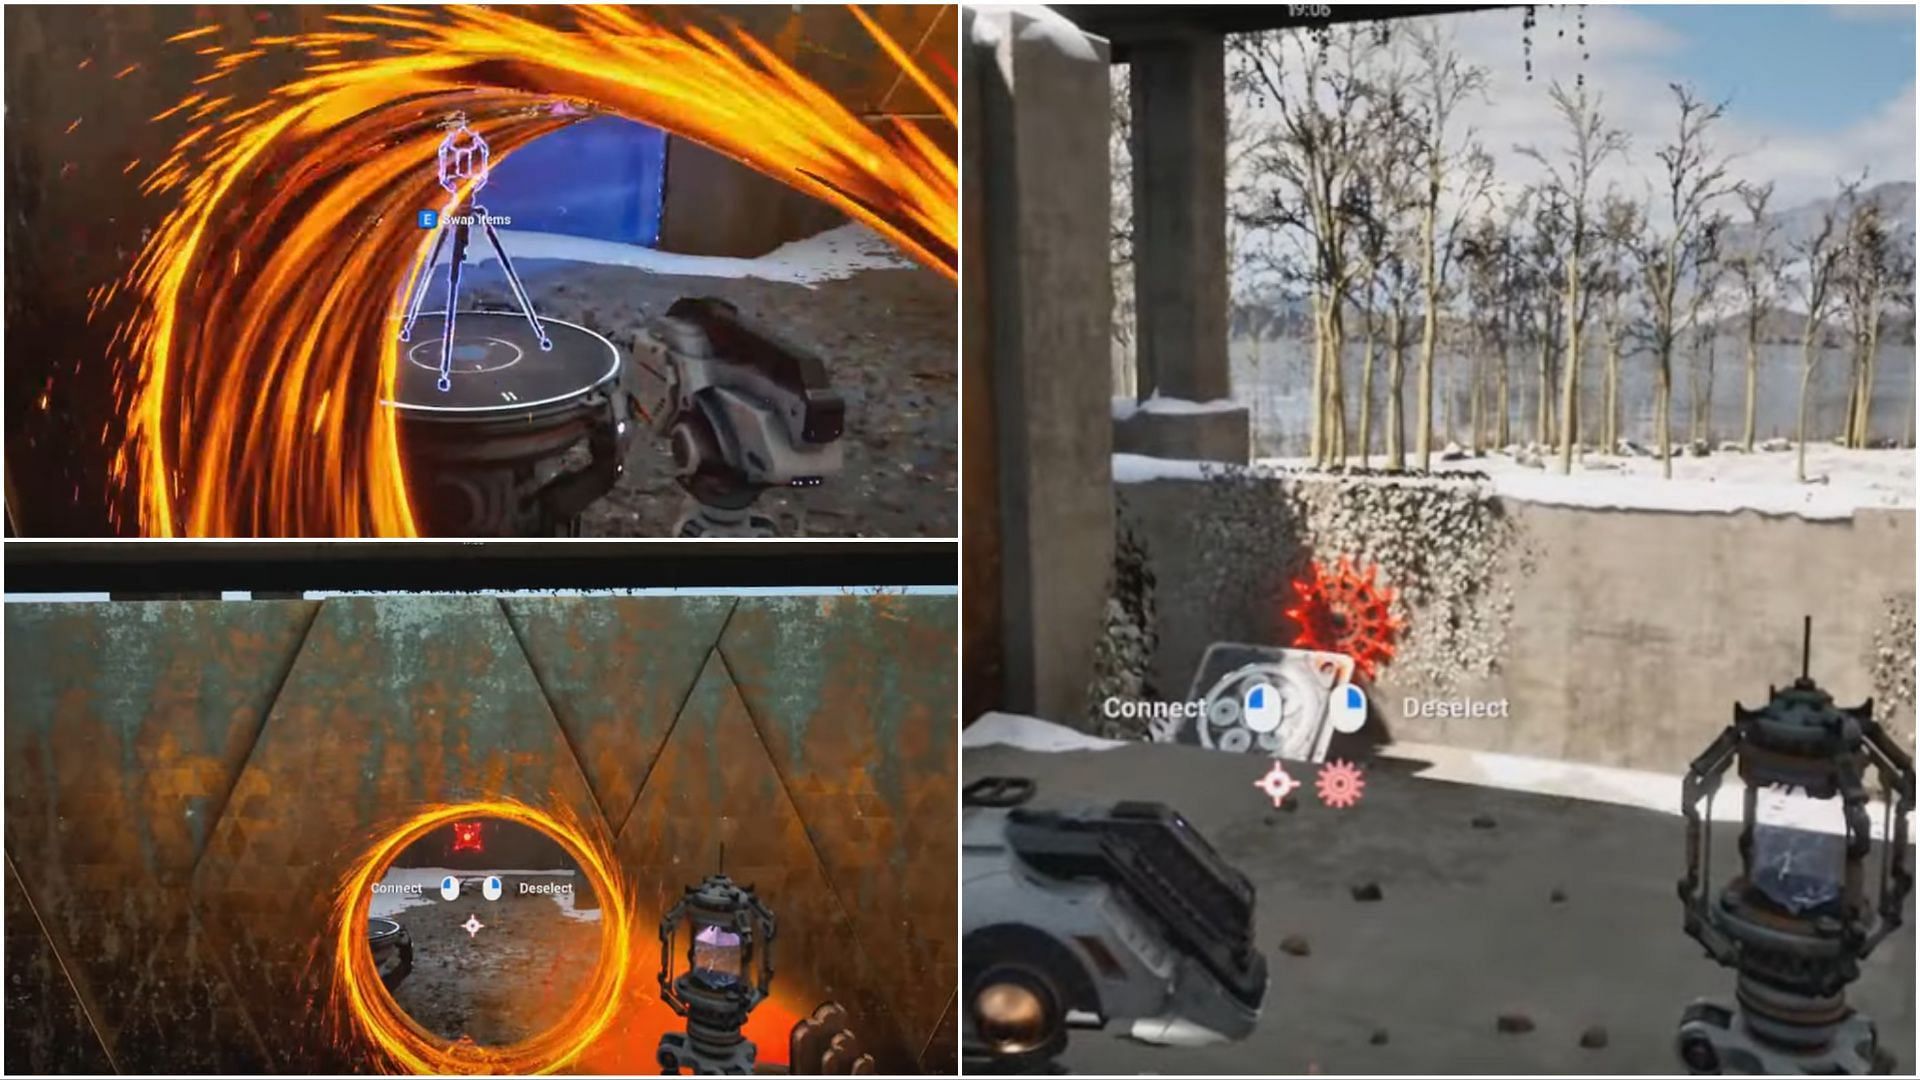
Descend to the ground, pick up the jammer, and proceed towards the fan device. Reach the rusted iron wall, and through the hole, you will spot another rotating device with a connector. Swap the jammer with the connector. Through the hole, you'll see a red switch straight ahead. Select this switch and then turn right to locate another red switch in the corner and select it as well.
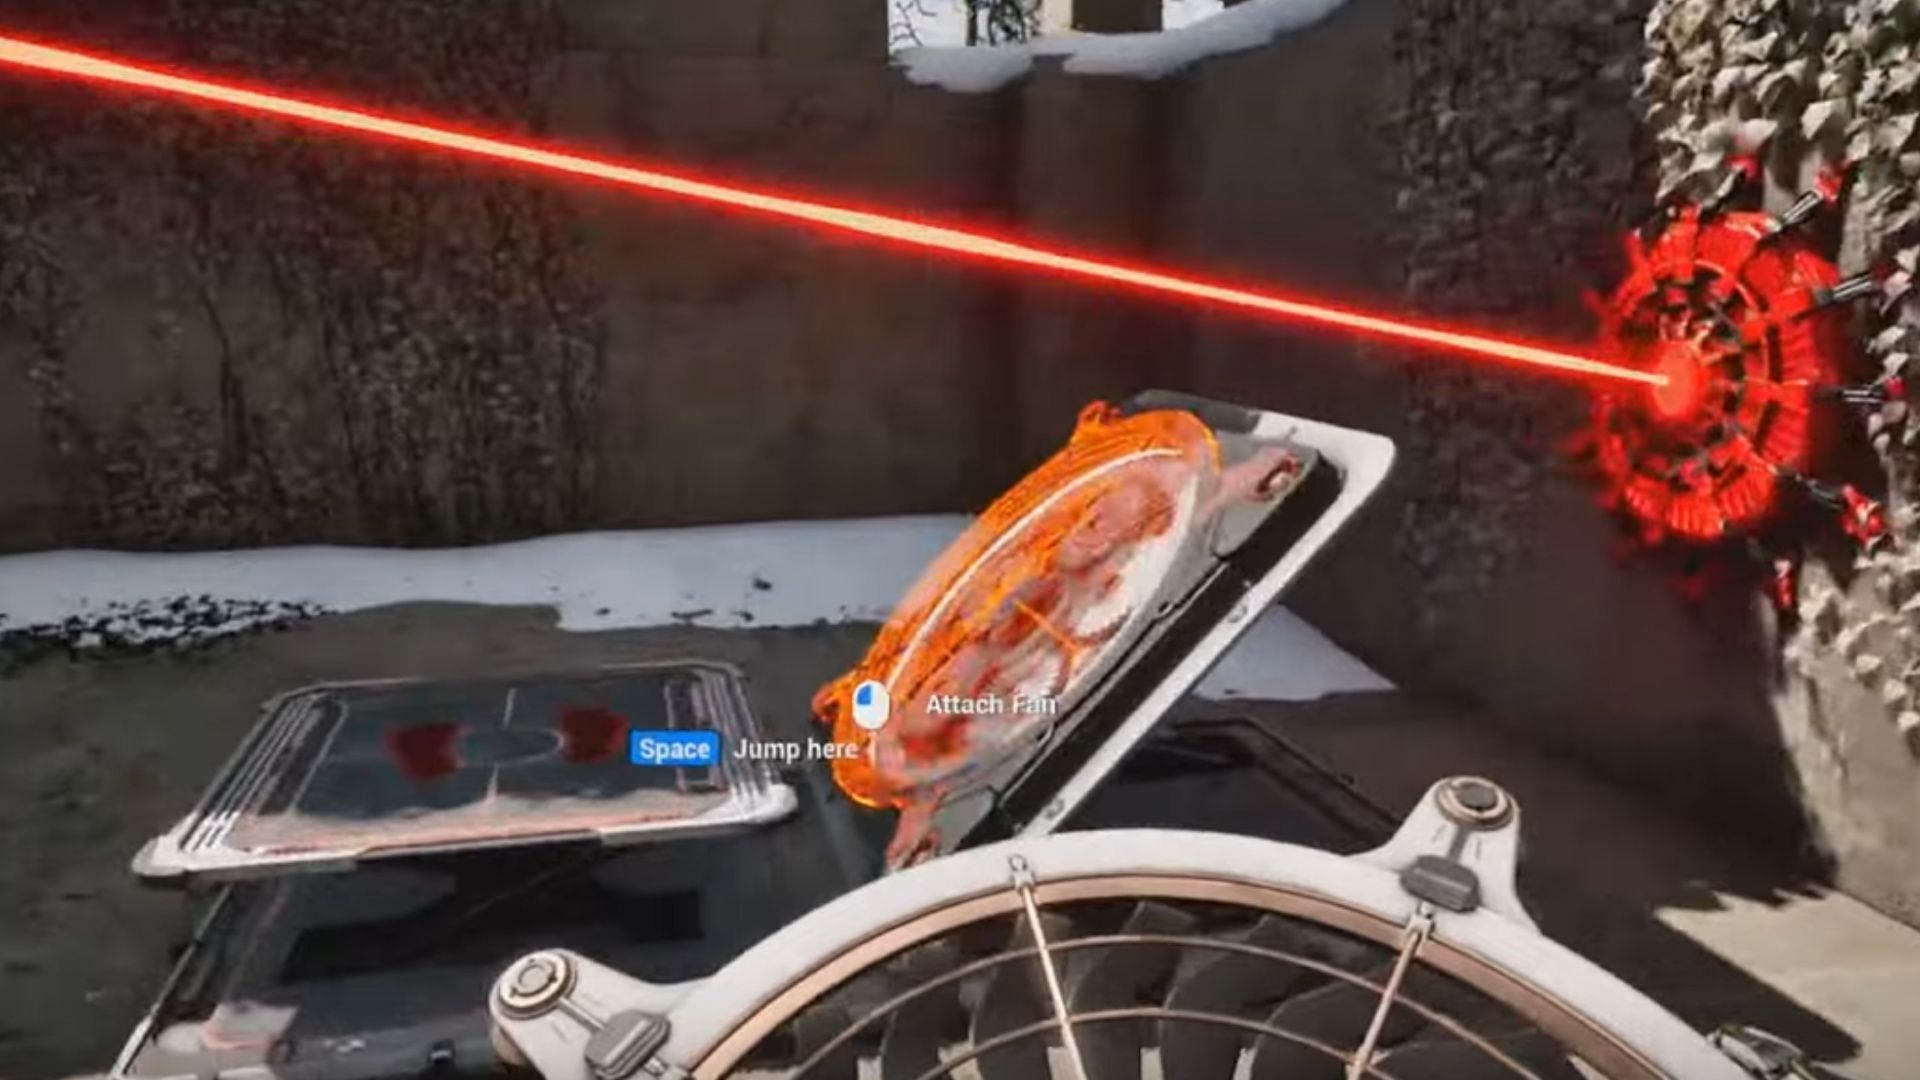
After selecting both switches, place the connector through the hole to align it with the red switches. Now, pick up the driller, return to the ground, and go towards the rotating device. Swap the driller with the fan vents, head to the corner near the red switch, and you will come across a fan device without vents.
Insert the vents into the fan device to activate it. Step on it for a jump boost, and you will reach the main device area. Once there, you will see the connector aligns with the switches, and a rotating device holds a jammer.
Take the connector, swap it with the jammer, and then place the jammer in front of the laser barrier, blocking access to the main device. The barrier will be deactivated, allowing you to interact with the main device and complete the puzzle in The Talos Principle 2.
You can follow Sportskeeda for more puzzle guides from The Talos Principle 2.
Obsessed with Crosswords, Wordle, and other word games? Take our quick survey and let us get to know you better!
